

Heres Some Camping Tips & Tricks at Your Fingertips
Our Knoxville Campground Blog is the information you need to make your next camping trip in Tennessee even more enjoyable. From RV and camping tips and tricks, to amazing campfire recipes, to advice on planning your next trip in Knoxville, TN... the information below is here to help you. And please, feel free to comment and share your experiences, knowledge and favorite recipes. At Knoxville Campground, we are a family and all here to help each other enjoy the great outdoors to the fullest!
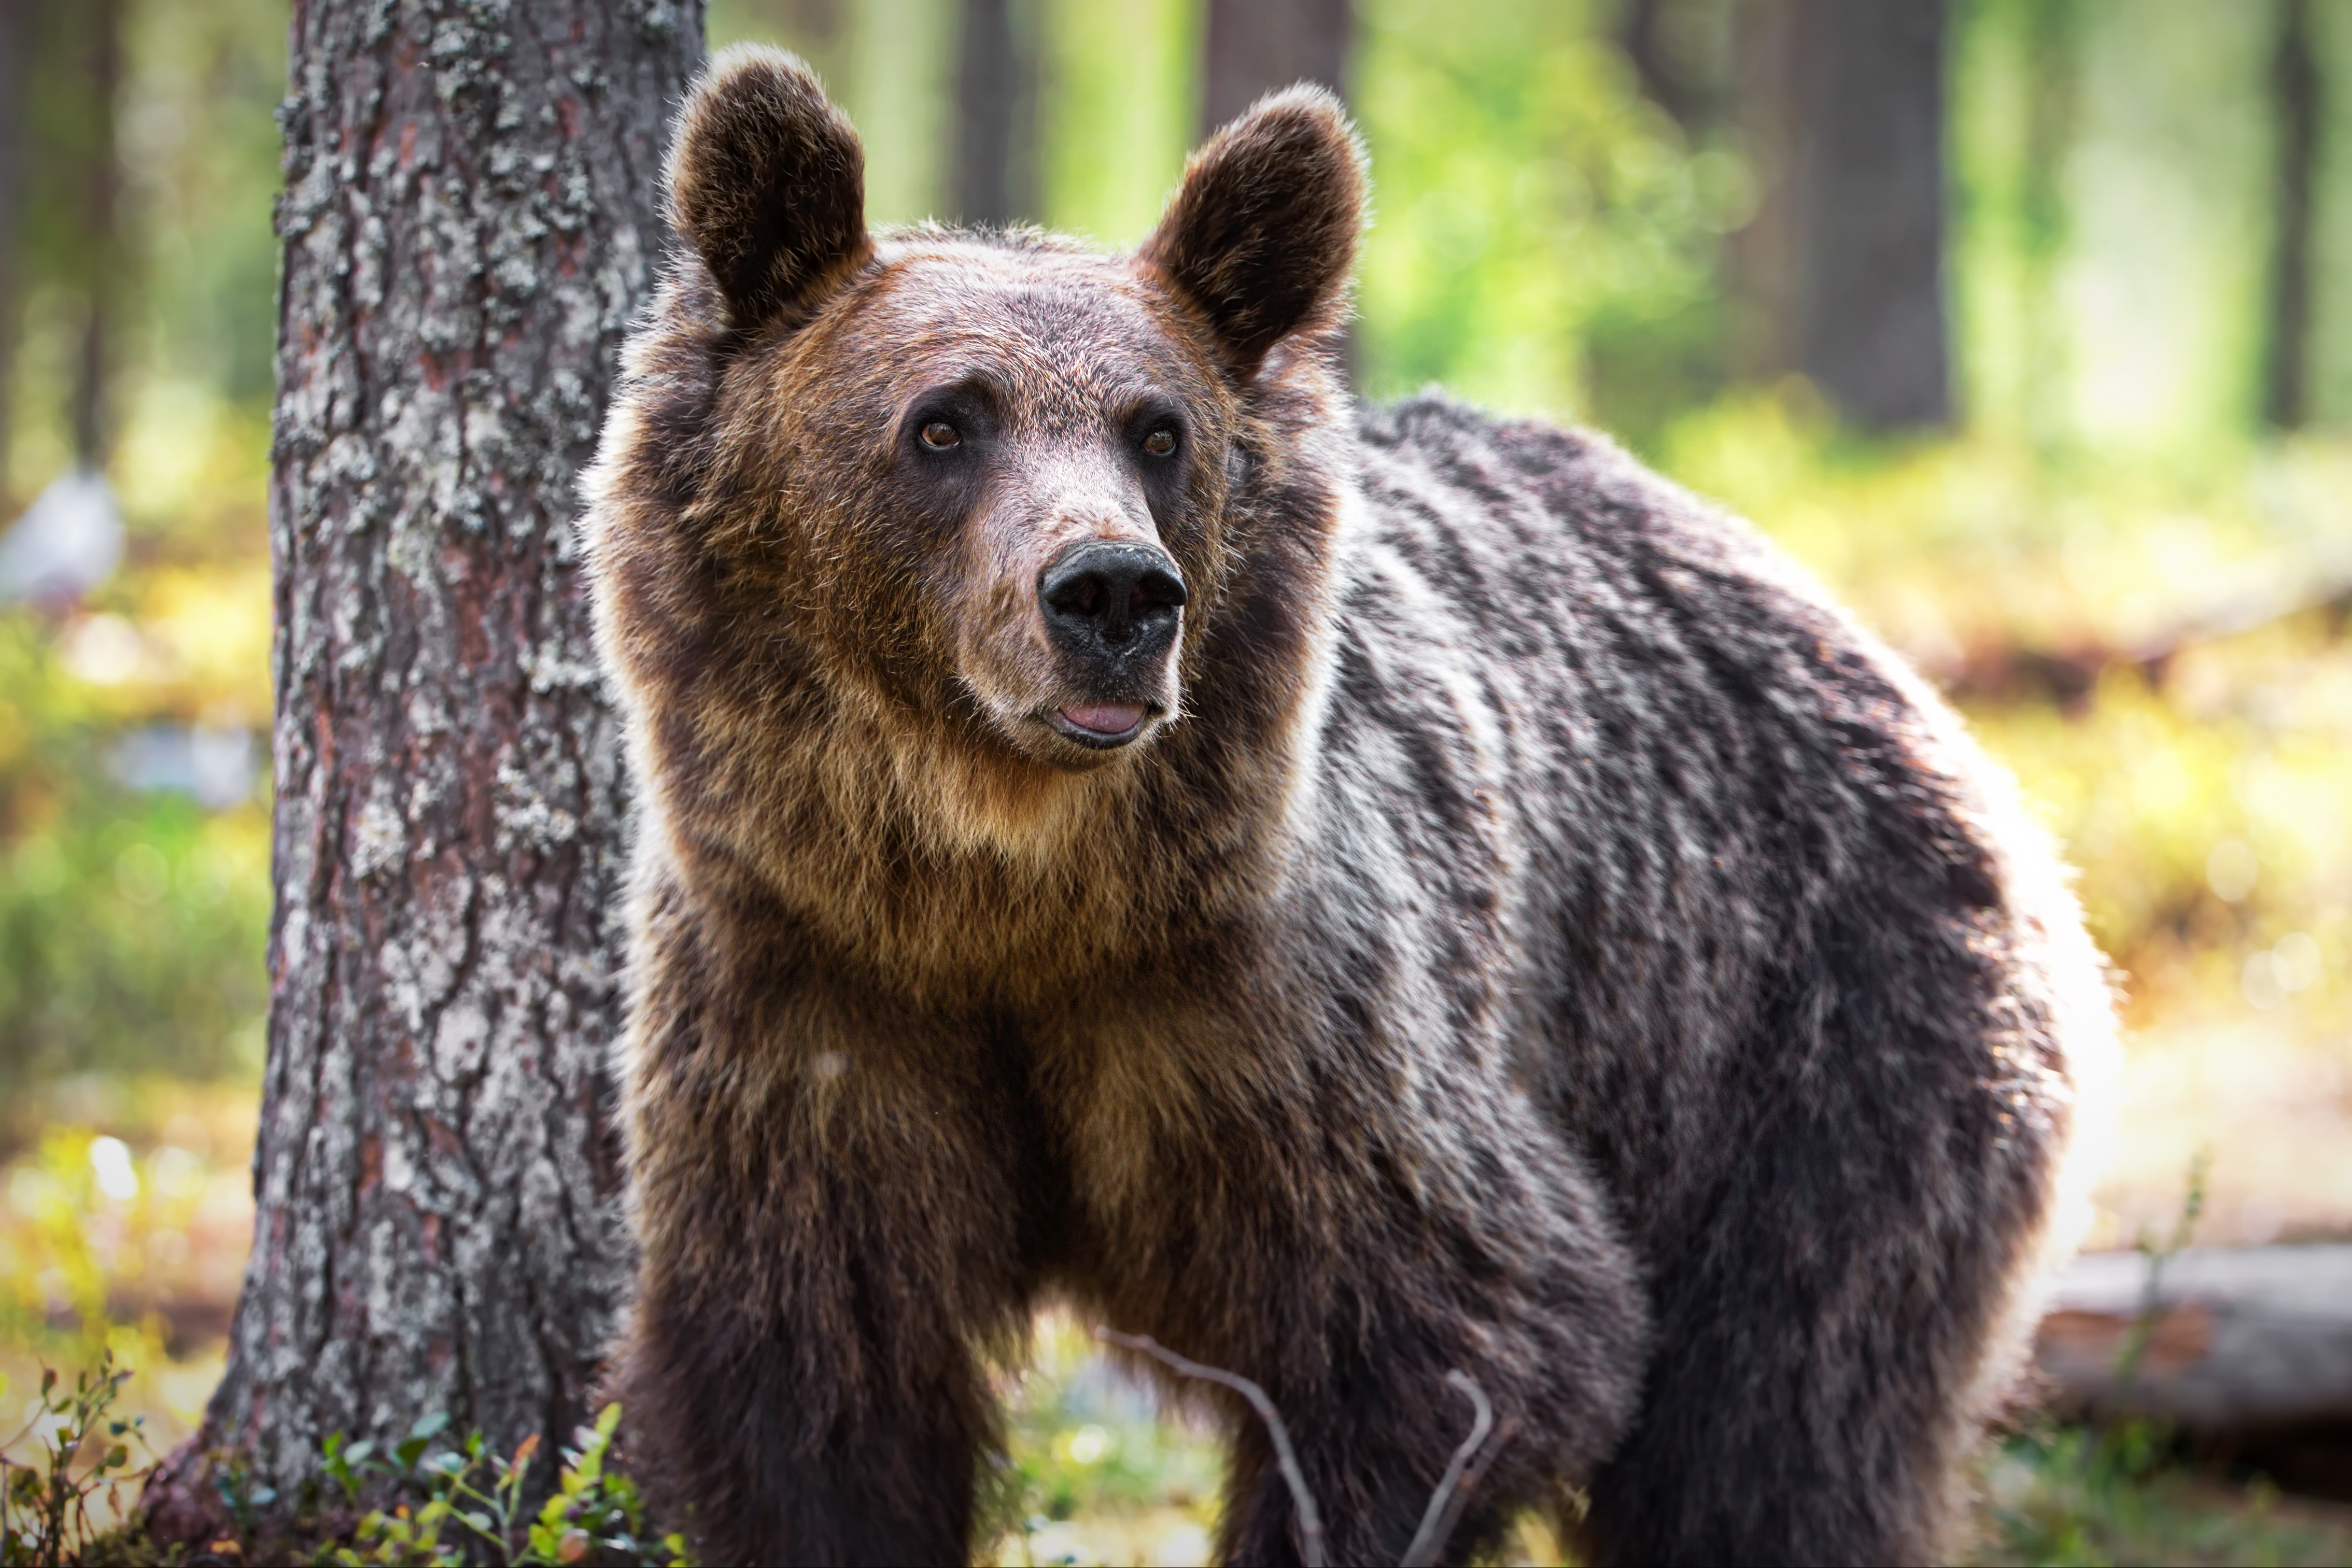
Using Bear Spray Effectively
Using bear spray effectively is crucial for ensuring your safety during an encounter with a bear. Here are the steps and tips for using bear spray properly:
Before an Encounter
- Purchase the Right Bear Spray:
- Ensure it’s EPA-approved.
- The canister should have at least 7.9 ounces (225 grams) of spray.
- Familiarize Yourself with the Spray:
- Read the instructions thoroughly.
- Practice removing the safety clip without discharging the spray.
- Keep the Spray Accessible:
- Carry it in a holster on your belt, chest, or in an easily reachable location on your backpack.
- Do not store it inside your pack or any place difficult to reach quickly.
During an Encounter
- Identify the Bear’s Behavior:
- Determine if it is defensive or predatory. Defensive bears might be protecting cubs or food and can often be deterred. Predatory bears are rare but very dangerous, as they see you as prey.
- Prepare to Use the Spray:
- Remove the safety clip.
- Hold the can with both hands if possible for better aim and stability.
- Aim Correctly:
- Aim slightly downward in front of it so the spray forms a barrier.
- Try to aim for the face if it is charging at you.
- Spray at the Right Time:
- Use short bursts of 1-2 seconds.
- Begin spraying when it is about 30-60 feet (9-18 meters) away.
- Create a Barrier:
- If it continues to approach, keep spraying to maintain a barrier of spray between you and the bear.
- Spray downwind if possible to avoid the spray blowing back at you.
After an Encounter
- Assess the Situation:
- Move away from the area while keeping an eye on the bear.
- Do not run; walk backwards slowly while facing the bear.
- Check the Spray:
- After using the spray, check how much is left. Replace the canister if it’s nearly empty.
- Report the Encounter:
- Inform local wildlife authorities about the bear encounter.
Additional Tips
- Wind Consideration: Always consider wind direction when using the spray to avoid it blowing back at you.
- Practice: Some sprays come with practice canisters. Use these to get comfortable with the spraying mechanism.
- Stay Calm: Keep as calm as possible to ensure accurate aim and avoid panicking.
Important Points to Remember
- Bear spray is a deterrent, not a repellent. It is effective because it irritates the bear’s eyes, nose, and lungs, creating an opportunity for you to retreat safely.
- Do not use bear spray like insect repellent; it should not be sprayed on your gear, tent, or yourself.
By understanding and practicing the use of bear spray, you can significantly increase your safety in bear country.
Even though there are no bears near Knoxville Campground, it’s important to know this information when camping.
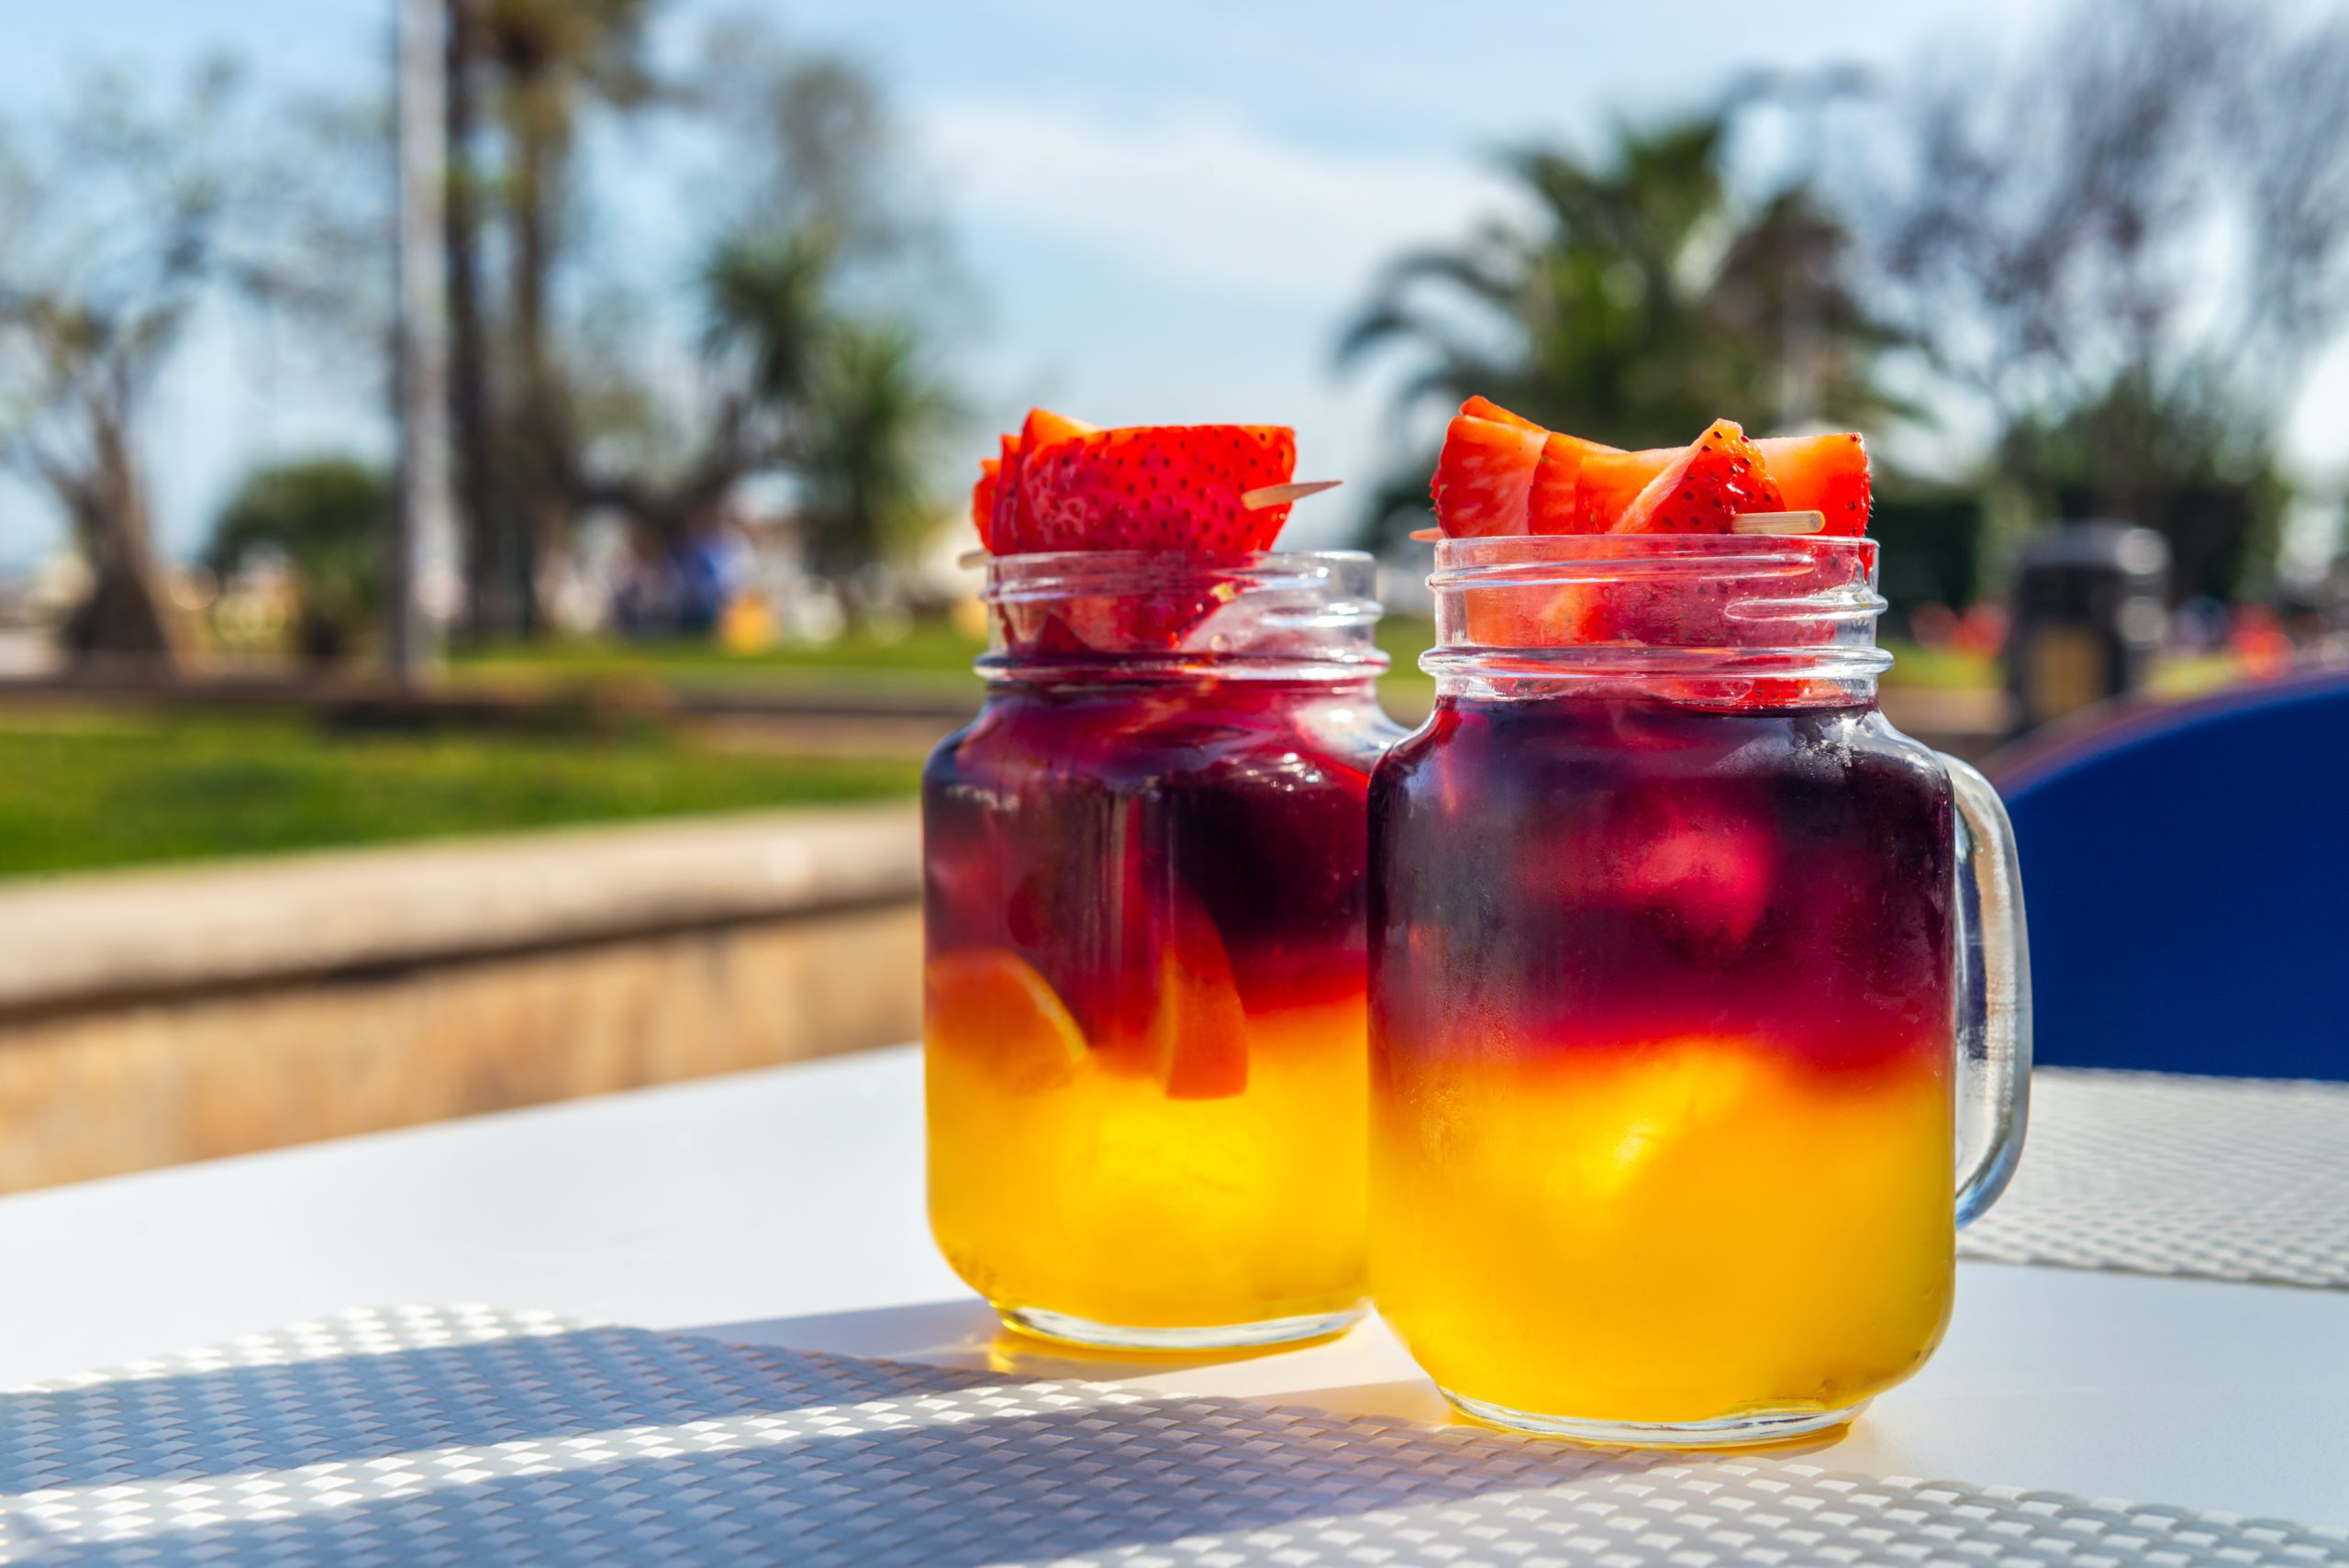
Camping Sangria
Camping sangria is a delightful twist on the classic sangria, perfect for enjoying around the campfire with friends. Here’s a simple recipe:
Ingredients:
- 1 bottle of red wine (a fruity red like Rioja or Merlot works well)
- 1 cup of orange juice
- 1/4 cup of brandy
- 1/4 cup of triple sec
- 1/4 cup of simple syrup (you can adjust this based on your sweetness preference)
- Sliced fruit (such as oranges, lemons, limes, and berries)
- Ice
- Club soda (optional, for serving)
Instructions:
- In a large pitcher or container, combine the red wine, orange juice, brandy, triple sec, and simple syrup. Stir well to combine.
- Add sliced fruit to the pitcher, stirring to incorporate.
- Cover the pitcher and place it in a cooler with ice to chill. Let it sit for at least an hour to allow the flavors to meld together.
- When ready to serve, fill glasses with ice and pour the sangria over the ice.
- If desired, top each glass with a splash of club soda for some fizziness.
- Garnish with additional fruit slices if desired.
- Enjoy your camping sangria responsibly and savor the flavors of the great outdoors!
Feel free to adjust the recipe based on your preferences and the ingredients you have on hand. Cheers to a fun and flavorful camping experience!
At Knoxville Campground, we ask you to drink responsibly when camping.

DIY Sidewalk Paint
Creating your own sidewalk paint can be a fun and creative project. Here’s a simple recipe using ingredients that are often readily available:
Materials:
- Cornstarch
- Water
- Food coloring or washable tempera paint
- Mixing bowls
- Mixing spoons
- Paintbrushes or sponge brushes
- Containers for storing paint (optional)
Instructions:
- Mix Cornstarch and Water:
- Start by mixing cornstarch and water in a bowl. Use a ratio of about 1 part cornstarch to 1 part water. You can adjust the amounts depending on how much paint you want to make.
- Stir Thoroughly:
- Stir the mixture until the cornstarch is completely dissolved in the water. You want a smooth, liquid consistency.
- Add Color:
- Once you have your base mixture, add food coloring or washable tempera paint to achieve your desired colors. Start with a few drops and mix well. Add more drops for a deeper color.
- Mix Well:
- Stir the paint mixture thoroughly to evenly distribute the color. Make sure there are no lumps or clumps in the paint.
- Test and Adjust:
- Before you start painting, test the consistency and color on a small area of the sidewalk. If the paint is too thick, you can add a little more water. If it’s too thin, add more cornstarch.
- Paint the Sidewalk:
- Use paintbrushes or sponge brushes to apply the sidewalk paint to the desired areas. Get creative with your designs and colors!
- Let it Dry:
- Allow the paint to dry completely before walking on it or letting children play on it. Drying time will depend on the weather conditions, but it usually takes a few hours.
- Clean Up:
- Clean up any spills or drips with water while the paint is still wet. Once it’s dry, it may be more difficult to remove.
- Store Any Leftover Paint:
- If you have leftover paint, you can store it in containers with lids for future use. Just make sure to label the containers with the colors inside.
Enjoy your homemade sidewalk paint and have fun adding color to your outdoor space!
A fun-to-use and easy-to-clean activity for the family to enjoy while camping at Knoxville Campground this summer.
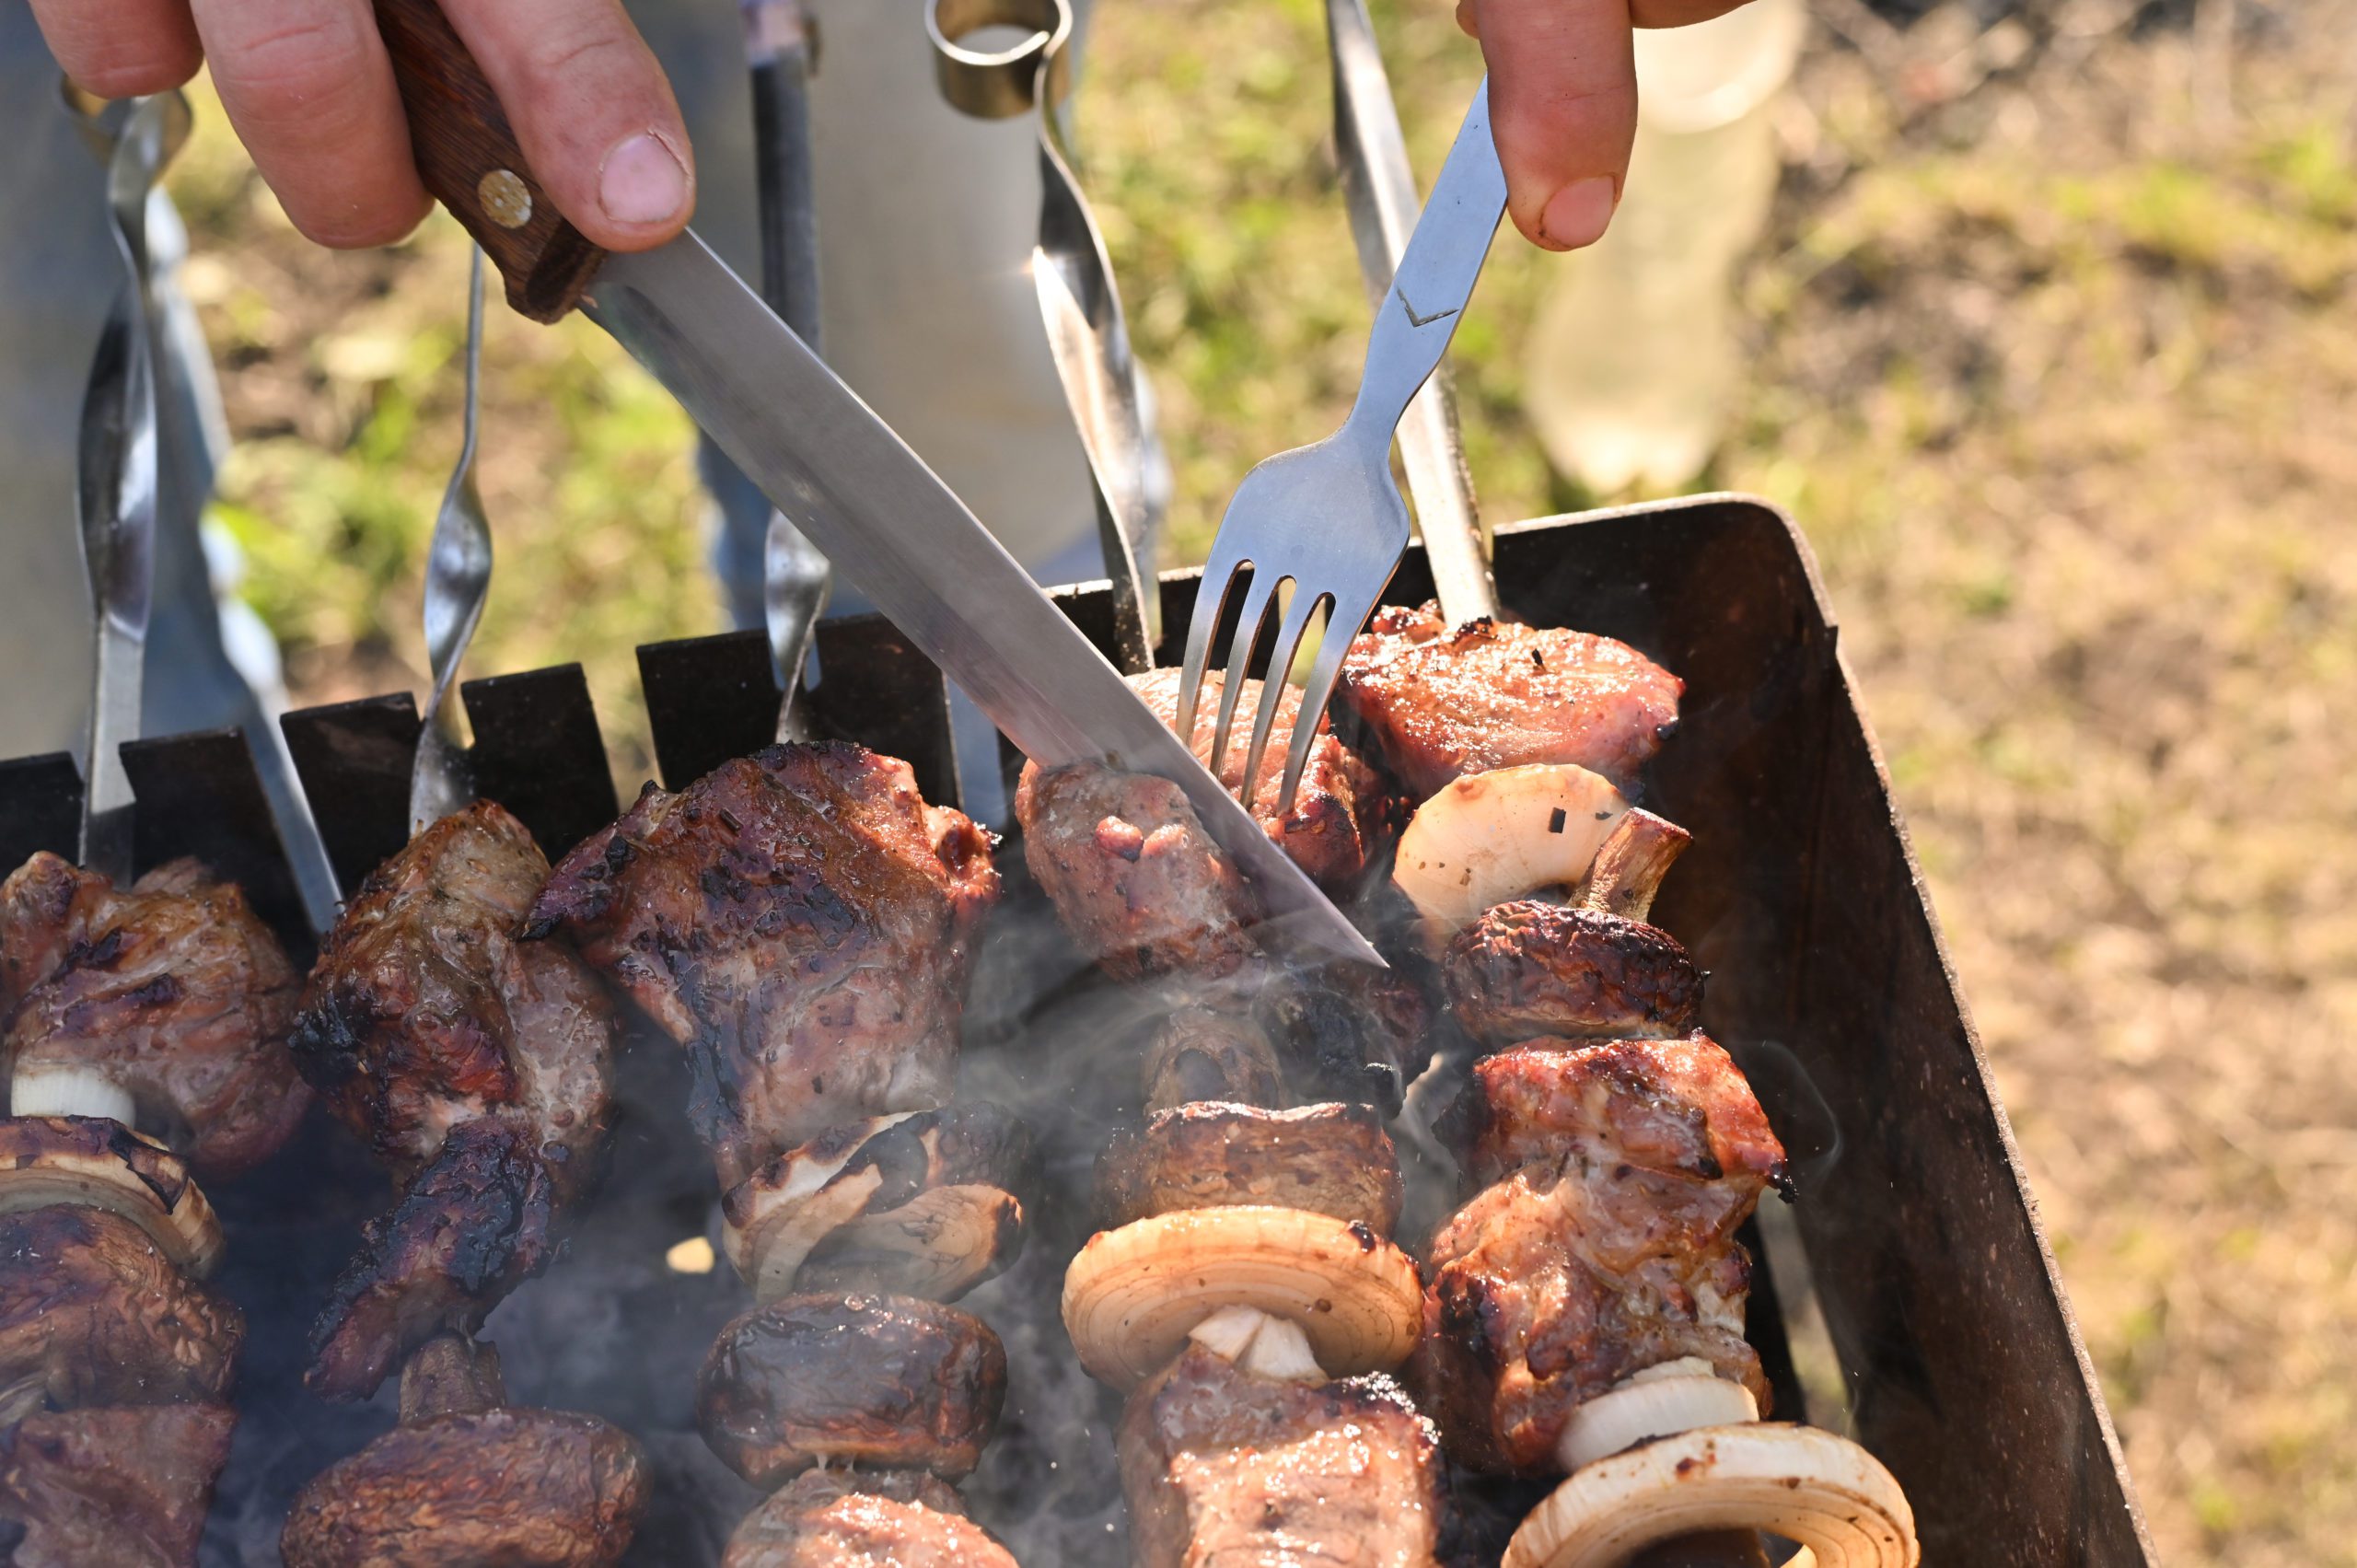
Campfire Steak, Potato, and Mushroom Kabobs
Campfire steak, potato, and mushroom kabobs are a delightful and hearty dish, perfect for outdoor gatherings or camping trips. Here’s a simple recipe to create these flavorful kabobs:
Ingredients:
- 1 lb (450g) sirloin steak, cut into cubes
- 1 lb (450g) baby potatoes, halved
- 8 oz (225g) mushrooms, cleaned and halved
- 1 onion, cut into chunks
- 2 bell peppers, cut into chunks
- 2 tablespoons olive oil
- 2 cloves garlic, minced
- 2 tablespoons soy sauce
- 1 tablespoon Worcestershire sauce
- 1 tablespoon Dijon mustard
- Salt and pepper to taste
- Wooden or metal skewers
Instructions:
1. Prepare the marinade:
- In a small bowl, whisk together the olive oil, minced garlic, soy sauce, Worcestershire sauce, Dijon mustard, salt, and pepper.
2. Marinate the steak:
- Place the cubed steak in a large bowl or resealable plastic bag and pour the marinade over it. Make sure the steak is evenly coated. Let it marinate in the refrigerator for at least 30 minutes, or ideally up to 4 hours.
3. Preheat the grill or campfire:
- If you’re using a grill, preheat it to medium-high heat. If you’re cooking over a campfire, make sure you have a good bed of hot coals.
4. Prepare the skewers:
- Thread the marinated steak, halved baby potatoes, mushrooms, onion chunks, and bell pepper chunks onto the skewers, alternating between the ingredients.
5. Grill the kabobs:
- Place the assembled kabobs on the preheated grill or over the campfire. Cook for about 10-12 minutes, turning occasionally, or until the steak is cooked to your desired doneness and the vegetables are tender and slightly charred.
6. Serve:
- Once cooked, remove the kabobs from the grill or campfire and let them rest for a few minutes. Serve hot, garnished with fresh herbs if desired.
Enjoy these delicious campfire steak, potato, and mushroom kabobs with your favorite side dishes and dipping sauces!
Get this full meal on one stick on your next camping trip to Knoxville Campground!

Spring Camping Outfits
Spring camping outfits should be comfortable, functional, and adaptable to changing weather conditions. Here are some suggestions for both men and women:
For Women:
- Layered Look:
- Start with a moisture-wicking base layer or a comfortable t-shirt.
- Add a lightweight, long-sleeve shirt or fleece for warmth during cooler mornings and evenings.
- Top it off with a waterproof or water-resistant jacket in case of rain.
- Bottoms:
- Opt for quick-drying hiking pants or leggings that offer flexibility and durability.
- Alternatively, you can go for convertible pants that can be converted into shorts if the weather warms up.
- Footwear:
- Choose sturdy hiking boots or trail shoes with good traction for walking on various terrains.
- Pack a pair of comfortable camp shoes like sandals or lightweight sneakers for lounging around the campsite.
- Accessories:
- Don’t forget a wide-brimmed hat or a baseball cap to shield yourself from the sun.
- Pack a lightweight scarf or buff that can serve as a neck warmer or headband.
- Sunglasses with UV protection are essential for eye safety.
- Extras:
- Bring along a lightweight, packable down jacket or vest for extra warmth if temperatures drop unexpectedly.
- Don’t forget to pack moisture-wicking socks and underwear for added comfort.
- A compact backpack with hydration reservoir or water bottle holder will be handy for carrying essentials during hikes.
For Men:
- Layered Look:
- Begin with a moisture-wicking base layer or a comfortable t-shirt.
- Layer up with a lightweight fleece or a long-sleeve shirt for added warmth.
- Have a waterproof or water-resistant jacket on hand for protection against rain.
- Bottoms:
- Choose durable hiking pants or cargo shorts that provide freedom of movement.
- Convertible pants are a versatile option, allowing you to adjust to changing temperatures.
- Footwear:
- Select sturdy hiking boots or trail shoes with good grip and ankle support.
- Bring along a pair of comfortable camp shoes like sandals or lightweight sneakers for relaxing at the campsite.
- Accessories:
- Wear a wide-brimmed hat or baseball cap to shield yourself from the sun.
- Carry a lightweight scarf or buff that can be used as a neck warmer or headband.
- Don’t forget sunglasses with UV protection to safeguard your eyes.
- Extras:
- Pack a packable down jacket or vest to layer up when temperatures drop.
- Ensure you have moisture-wicking socks and underwear for enhanced comfort.
- Bring a compact backpack with hydration reservoir or water bottle holder for carrying essentials during hikes.
Remember to check the weather forecast before your camping trip and adjust your clothing accordingly. Additionally, consider the specific activities you’ll be doing and any special gear you may need.
Show off your spring camping outfits at Knoxville Campground!

Campfire Chicken Meatballs
Campfire chicken meatballs are a delicious and easy-to-make dish perfect for outdoor gatherings or cozy indoor evenings by the fire. Here’s a simple recipe to try:
Campfire Chicken Meatballs Ingredients:
- 1 lb ground chicken
- 1/2 cup breadcrumbs
- 1/4 cup grated Parmesan cheese
- 1/4 cup finely chopped onion
- 2 cloves garlic, minced
- 1/4 cup chopped fresh parsley
- 1 teaspoon dried oregano
- 1 teaspoon dried basil
- 1/2 teaspoon salt
- 1/4 teaspoon black pepper
- Olive oil, for cooking
Instructions:
- Prepare the Meatball Mixture:
- In a large mixing bowl, combine ground chicken, breadcrumbs, Parmesan cheese, chopped onion, minced garlic, parsley, oregano, basil, salt, and black pepper. Mix well until all ingredients are evenly incorporated.
- Form Meatballs:
- Take small portions of the mixture and roll them into meatballs, about 1 to 1.5 inches in diameter. Place them on a plate or baking sheet lined with parchment paper.
- Cooking Over Campfire:
- Prepare your campfire, ensuring you have hot coals suitable for cooking.
- Thread the meatballs onto skewers, leaving a little space between each meatball.
- Drizzle some olive oil over the meatballs to prevent sticking.
- Place the skewers over the hot coals, ensuring they are not directly over flames to avoid burning. Cook for about 10-15 minutes, turning occasionally, until the meatballs are cooked through and browned on the outside.
- Serve:
- Once cooked, remove them from the skewers and serve hot. They can be enjoyed on their own as a snack or appetizer, or you can serve them with your favorite dipping sauce or alongside a salad or pasta.
Feel free to adjust the seasonings and spices according to your taste preferences. These campfire chicken meatballs are versatile and can be customized with your favorite herbs and spices. Enjoy your outdoor cooking experience!
Come over to Knoxville Campground and try this recipe for Campfire Chicken Meatballs.
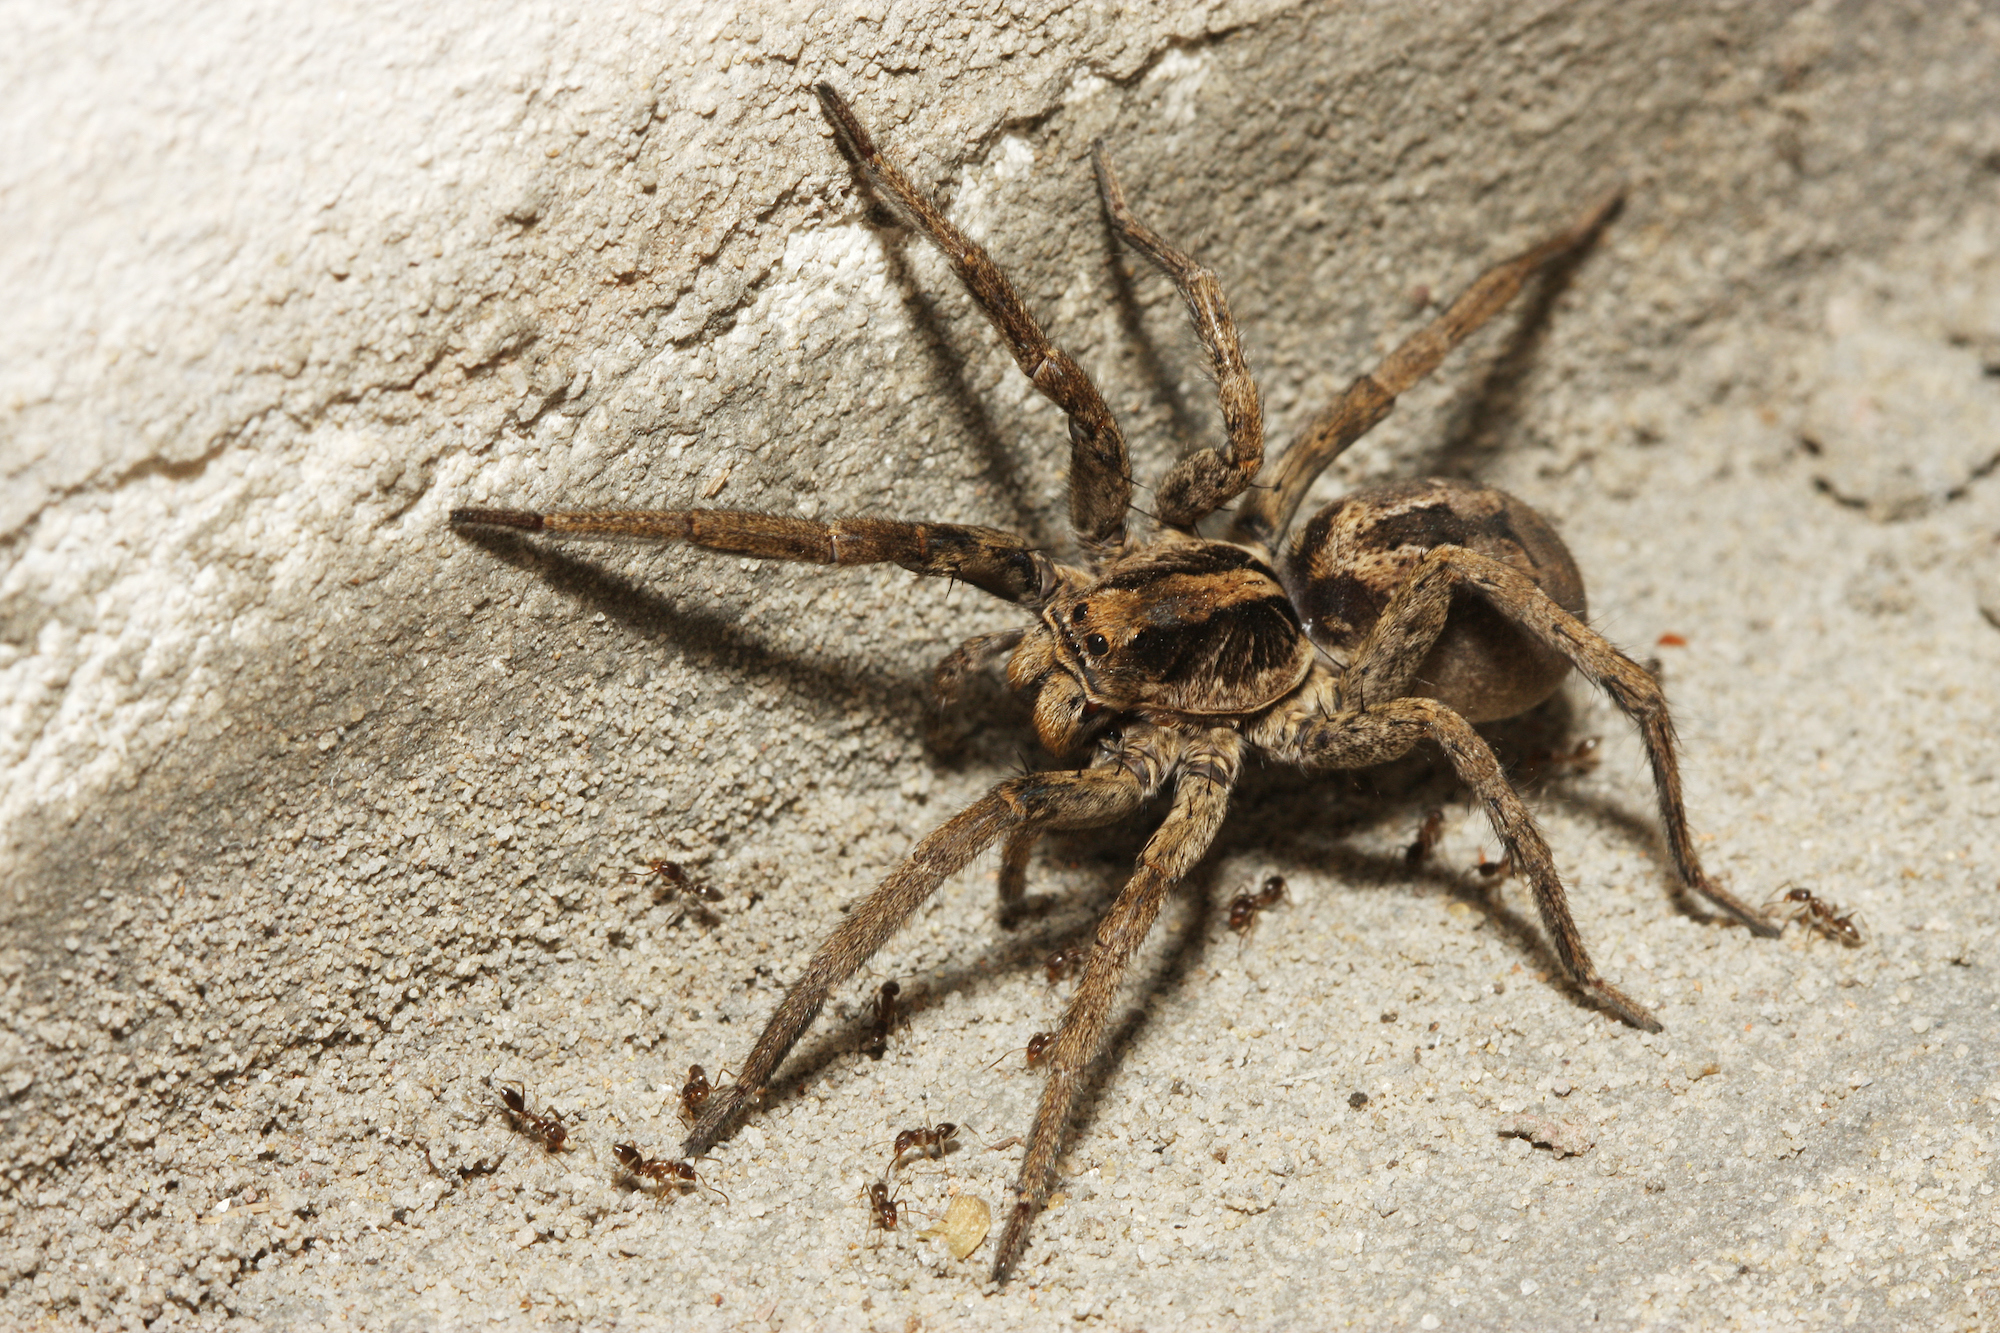
Dangerous Spiders in the Midwest
Several species of spiders found in the Midwest of the United States can potentially pose risks to humans due to their venomous bites. Here are some of the most notable ones:
Types of Spiders
- Brown Recluse Spider (Loxosceles reclusa): Brown recluse spiders are known for their venomous bite, which can cause tissue necrosis and, in severe cases, systemic reactions. They are typically light to dark brown in color and have a distinctive violin-shaped marking on their back.
- Black Widow Spider (Latrodectus mactans): Black widow spiders are notorious for their potent venom, which contains neurotoxins. Bites from black widows can cause severe pain, muscle cramps, and other systemic symptoms. Female black widow spiders are black with a red hourglass-shaped marking on their abdomen, while males are smaller and lighter in color.
- Hobo Spider (Eratigena agrestis): While the hobo spider’s venom toxicity and its status as a medical threat are still debated, it’s considered potentially dangerous. Its bite may cause localized pain, redness, and tissue damage.
- Yellow Sac Spider (Cheiracanthium spp.): Yellow sac spiders are common in the Midwest and can deliver a painful bite. While their venom is not as potent as that of brown recluse or black widow spiders, their bites can still cause localized pain, redness, and swelling.
- Wolf Spider (Lycosidae spp.): Wolf spiders are large, hairy spiders commonly found in the Midwest. While their venom is not considered dangerous to humans, their bite can still cause localized pain, swelling, and redness.
It’s essential to exercise caution and take preventive measures, such as shaking out clothing and shoes before wearing them and using caution when working in areas where spiders may be present. If bitten by a spider and experiencing severe symptoms, seek medical attention immediately. Additionally, if possible, try to capture the spider (without putting yourself at risk) or take a photo of it for identification purposes, as this can assist healthcare professionals in providing appropriate treatment.
At Knoxville Campground, we ask you to be careful when being in the outdoors. Always look over your surroundings and be cautions in wooded areas.
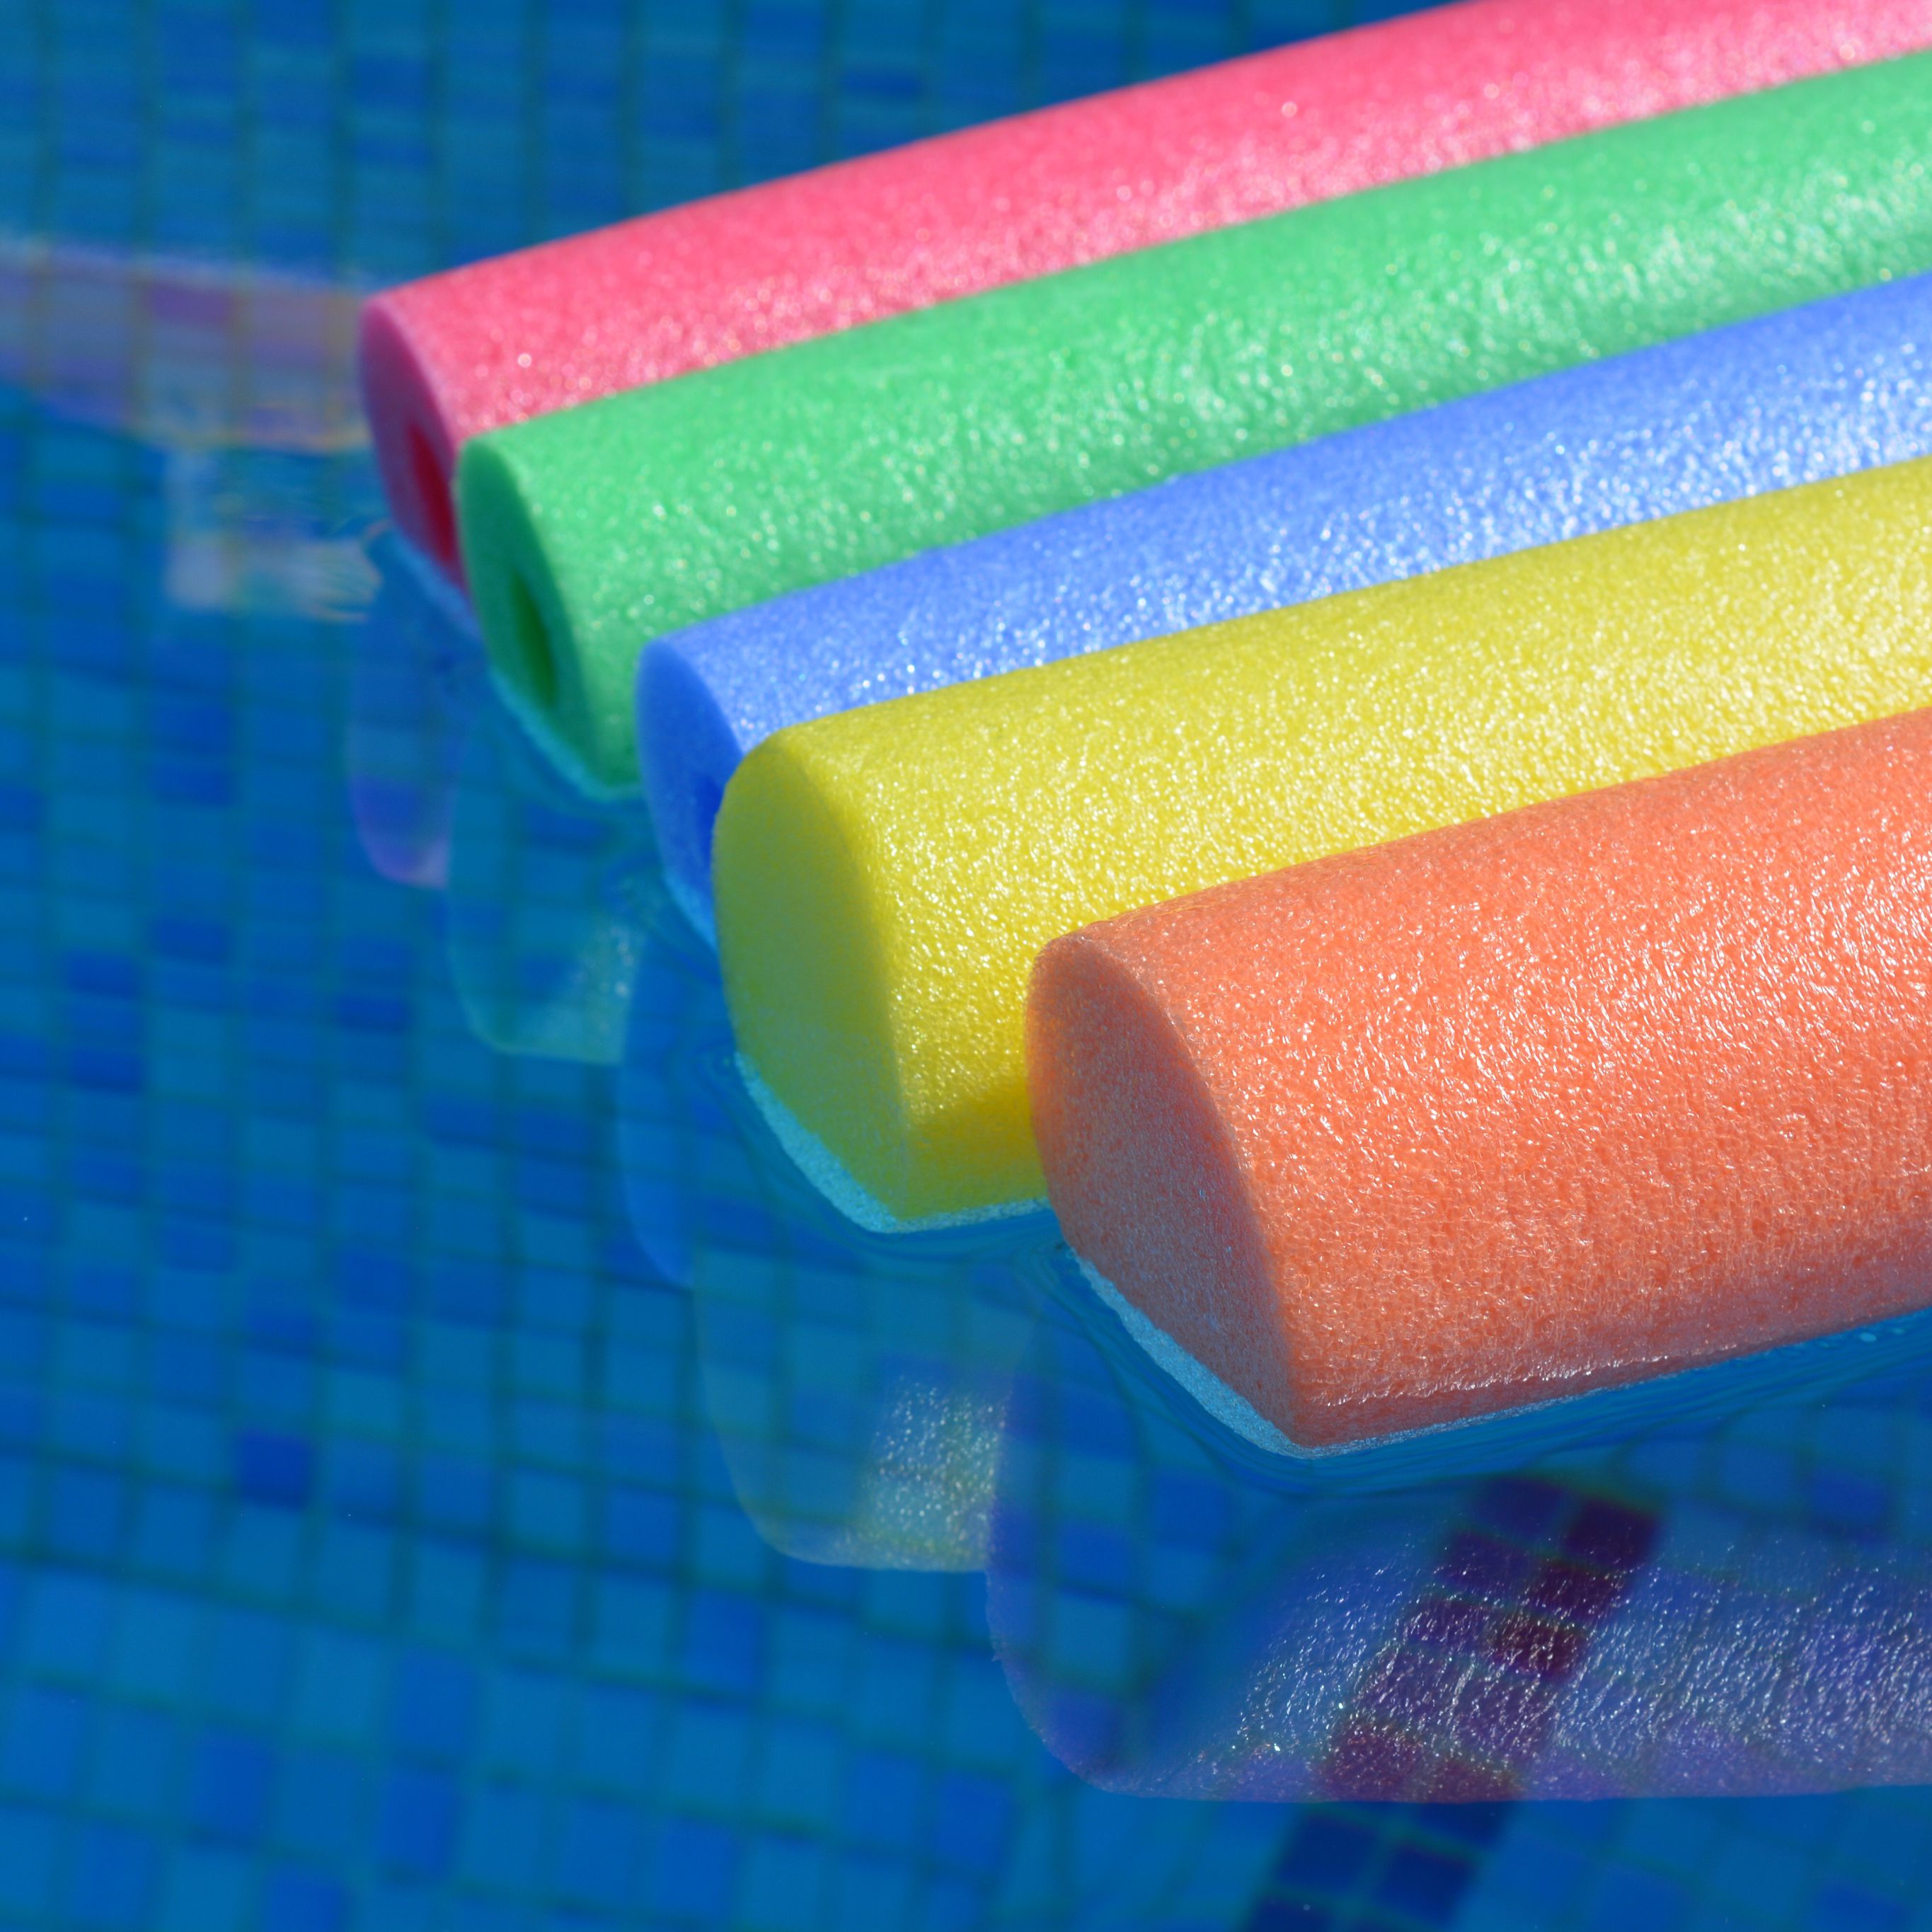
Pool Noodle Camping Hacks
Using pool noodles for camping can be a creative and versatile solution. Here are some fun and practical pool noodle camping hacks:
Hacks
Tent Padding:
- Cut pool noodles to the length of your tent poles and slide them over the poles. This adds extra cushioning to prevent injuries and makes your tent more visible at night.
DIY Camp Seat:
- Attach two pool noodles together to form a circle, securing the ends with duct tape. Place it on the ground, and you have a comfortable and insulated seat.
Bed Bumpers:
- Place pool noodles alongside the edges of your sleeping pad or air mattress to prevent rolling off during the night.
Flashlight Diffuser:
- Slide a small section of a pool noodle over the end of a flashlight. This softens the light and creates a makeshift lantern for your tent.
Drink Holder:
- Slice a pool noodle into smaller sections and attach them to the side of a camping chair to create convenient drink holders.
Clothesline Protector:
- String a clothesline between trees for drying clothes. Cover the line with a pool noodle to avoid creases and marks on your clothes.
Campsite Marker:
- Cut a pool noodle into smaller pieces and slide them over tent stakes. This makes them more visible and less of a tripping hazard.
Campsite Lights:
- Insert glow sticks inside hollow pool noodles to create colorful and safe pathway lights around your campsite.
Protection for Gear:
- Slice a pool noodle lengthwise and attach it to the edges of your kayak or canoe to prevent scratches and dings.
Campfire Seating:
- Create a ring of pool noodles to use as a buffer between you and the cold ground when sitting around the campfire.
DIY Floating Cooler:
- Use a pool noodle to create a floating cooler by threading it through the handles of a plastic container. This keeps your drinks cool while you’re in the water.
Bug Deterrent:
- String pool noodles around the bottom of your camping canopy to act as a barrier against crawling insects.
Remember to use waterproof and weather-resistant materials when necessary, and always consider safety precautions when implementing these hacks.
Try these hacks on your next trip to Knoxville Campground.
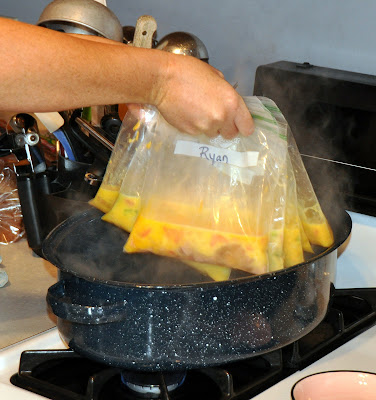
Campfire Omelette in a Bag
Making a campfire omelette in a bag is a convenient and fun way to cook breakfast while camping. Here’s a simple recipe for a campfire omelette using a plastic bag:
Ingredients:
- 2–3 eggs
- Salt and pepper to taste
- Fillings of your choice (e.g., diced vegetables, cheese, cooked meat)
- Cooking spray or oil
- Ziplock plastic bag (make sure it’s heat-resistant)
Instructions:
- Prepare Ingredients:
- Crack the eggs into a bowl, add salt and pepper, and beat them with a fork or whisk until well combined. Chop any vegetables or other fillings you want to add to the omelette.
- Spray Bag:
- Spray the inside of the Ziplock bag with cooking spray or add a small amount of oil and spread it around to prevent sticking.
- Add Ingredients to Bag:
- Pour the beaten eggs into the bag. Add your chosen fillings.
- Seal Bag and Mix:
- Seal the bag tightly, ensuring there’s minimal air inside. Carefully squish and mix the ingredients in the bag, making sure the eggs and fillings are well combined.
- Boil Water:
- If you’re camping, bring a pot of water to a boil over the campfire or on a portable stove.
- Cook the Bag:
- Place the sealed bag into the boiling water. Make sure the bag is fully submerged. Let it cook for about 10-15 minutes, or until the eggs are set.
- Remove and Serve:
- Carefully remove the bag from the boiling water. Open the bag, and the omelette should easily slide out onto a plate. Be cautious as it will be hot.
- Optional: Customize:
- Add additional toppings like salsa, hot sauce, or herbs to customize your omelette.
This method is great for camping because it requires minimal cleanup, and each person can customize their omelette with their favorite ingredients. Just be sure to use a plastic bag that is heat-resistant and food-safe. Enjoy your campfire omelette!
If you’re not trying this recipe at Knoxville Campground, then what you even doing?
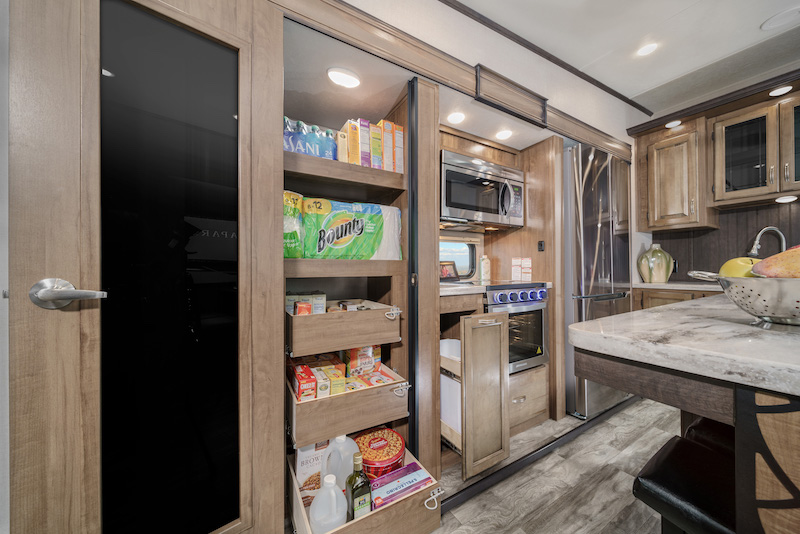
Stocking an RV Pantry
Stocking your RV pantry requires some thoughtful planning to ensure you have the necessary items for a comfortable and enjoyable trip. Here’s a list of essentials you might want to consider:
Dry Goods:
- Canned Goods:
- Soups, stews, and chili
- Beans and legumes
- Vegetables and fruits
- Tuna or canned chicken
- Grains:
- Rice
- Quinoa
- Pasta
- Oats
- Baking Essentials:
- Flour
- Sugar
- Baking powder
- Cooking oil
- Snacks:
- Trail mix
- Crackers
- Popcorn
- Granola bars
- Condiments:
- Ketchup
- Mustard
- Mayonnaise
- Hot sauce
Refrigerator and Fresh Produce:
- Dairy:
- Cheese
- Butter
- Milk
- Yogurt
- Proteins:
- Eggs
- Deli meats
- Hummus
- Fresh meats if you have a reliable cooling system
- Fruits and Vegetables:
- Apples, oranges, or other durable fruits
- Carrots, bell peppers, and other veggies that last
Beverages:
- Water:
- Stock up on bottled water for drinking and cooking.
- Coffee and Tea:
- Ground coffee or coffee pods
- Tea bags
- Juices and Soft Drinks:
- Consider canned or boxed versions for convenience.
- Alcohol:
- If you enjoy alcoholic beverages, pack your favorites.
Pantry Staples and Spices:
- Herbs and Spices:
- Salt, pepper, garlic powder, onion powder, etc.
- Your favorite herbs and spices for flavoring meals.
- Sauces and Dressings:
- Olive oil
- Soy sauce
- Salad dressings
- Canned Sauces:
- Tomato sauce
- Pesto
- Alfredo sauce
Miscellaneous Items:
- Paper Products:
- Paper towels
- Napkins
- Disposable plates and utensils
- Cleaning Supplies:
- Biodegradable soap
- Trash bags
- Cleaning wipes
- First Aid Kit:
- Basic medical supplies and any necessary medications.
- Cooking Utensils and Tools:
- Pots, pans, and a kettle
- Cooking utensils (spatula, ladle, etc.)
- Can opener
- Cutting board
- Storage Containers:
- Ziplock bags and containers for leftovers.
Remember to tailor this list based on your personal preferences and dietary restrictions. Additionally, consider the duration of your trip and the availability of grocery stores along the way. Planning and organization will make your RV pantry efficient and enjoyable for the entire journey.
Use this as your checklist for your next trip to Knoxville Campground.

Family owned and operated, Kiefer Campgrounds strive to offer you the best rates for a comfortable location with outstanding service, and spotless facilities. When you stay in one of our parks, you are no longer just a happy camper, but a part of our family! We are most certain you will enjoy your stay with us. Pick your favorite location and book your spot now before it’s too late! You’ll be happy you did!