Heres Some Camping Tips & Tricks at Your Fingertips
Our Knoxville Campground Blog is the information you need to make your next camping trip in Tennessee even more enjoyable. From RV and camping tips and tricks, to amazing campfire recipes, to advice on planning your next trip in Knoxville, TN... the information below is here to help you. And please, feel free to comment and share your experiences, knowledge and favorite recipes. At Knoxville Campground, we are a family and all here to help each other enjoy the great outdoors to the fullest!
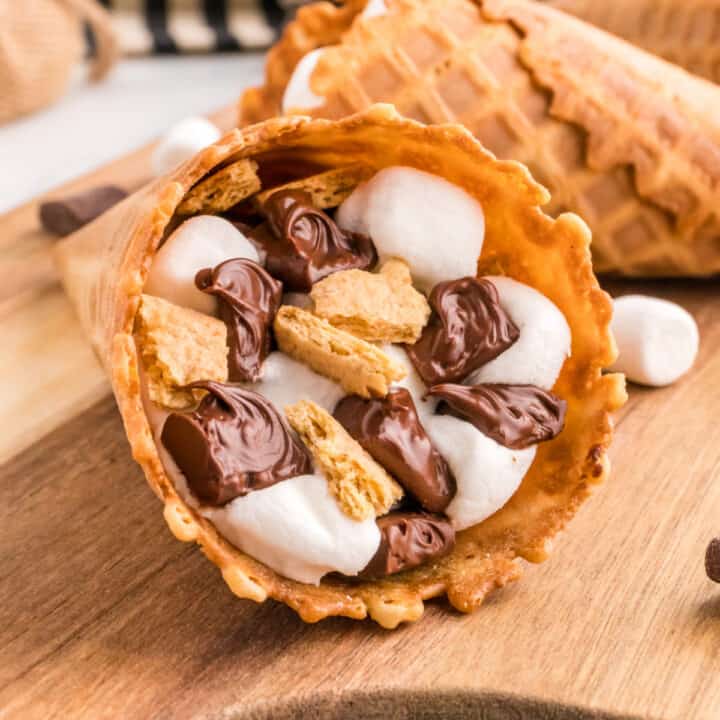
Campfire Cones
Campfire cones are a delightful and easy-to-make camping treat that combines the joy of roasting marshmallows with the convenience of a handheld cone. Here’s a simple recipe for making campfire cones:
Ingredients:
- Ice cream cones (sugar cones work well)
- Mini marshmallows
- Chocolate chips
- Assorted toppings (e.g., chopped nuts, crushed graham crackers, sprinkles, caramel sauce)
Instructions:
- Prepare Ingredients:
- Gather all your ingredients and toppings.
- You can customize the cones with your favorite treats.
- Fill Cones:
- Start by filling the ice cream cones with a combination of mini marshmallows and chocolate chips.
- Add any other desired toppings to the mix.
- Wrap in Foil:
- Wrap each filled cone in aluminum foil, making sure to seal the ends to keep the ingredients secure.
- Campfire Cooking:
- Place the wrapped cones on the grate over the campfire or on hot coals.
- Cook for about 5-7 minutes, turning occasionally to ensure even melting and cooking.
- Be cautious not to place them too close to direct flames to prevent burning.
- Check for Doneness:
- After a few minutes, carefully unwrap one cone and check the contents. The marshmallows should be melted, and the chocolate chips should be gooey.
- Serve and Enjoy:
- Once done, carefully remove the campfire cones from the heat using tongs.
- Allow them to cool for a minute before unwrapping fully.
- Enjoy your delicious, gooey campfire cones!
Tips:
- Experiment with different chocolate flavors like dark chocolate or white chocolate chips.
- Add a drizzle of caramel or chocolate sauce for extra indulgence.
- Get creative with additional toppings like crushed cookies, fruit bits, or shredded coconut.
Campfire cones are a fun and interactive camping treat, perfect for sharing with friends and family around the fire. Just be mindful of the heat and enjoy the gooey goodness of these delicious campfire creations!
The perfect treat to make with your family on your next trip to Knoxville Campground!
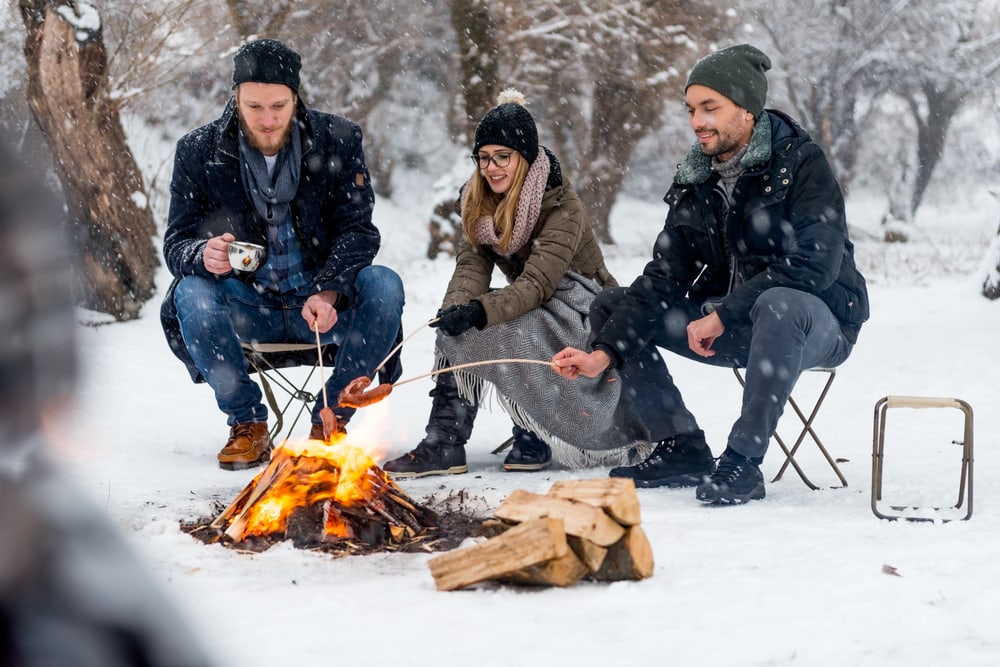
Winter Camping Outfit
Winter camping requires special attention to clothing to ensure warmth, comfort, and safety in cold conditions. Here’s a suggested list of clothing items for winter camping:
- Base Layers:
- Top and Bottom Thermal Underwear: Choose moisture-wicking materials like merino wool or synthetic fabrics to keep sweat away from your body.
- Insulating Layers:
- Fleece or Down Jacket: Provides insulation to retain body heat.
- Insulated Vest: Adds extra core warmth without restricting arm movement.
- Outer Shell:
- Waterproof and Windproof Jacket and Pants: Gore-Tex or similar materials are excellent for keeping you dry in snowy or wet conditions.
- Head and Neck Protection:
- Insulated Hat/Beanie: Keep your head warm, as a significant amount of body heat is lost through the head.
- Neck Gaiter or Buff: Protect your neck and lower face from cold winds.
- Hands:
- Insulated Gloves: Waterproof and windproof gloves are essential to prevent frostbite.
- Mittens: In extremely cold conditions, mittens provide better warmth than gloves.
- Feet:
- Insulated Waterproof Boots: Keep your feet warm and dry. Ensure they are suitable for the temperature and conditions you expect.
- Moisture-Wicking Socks: Wool or synthetic materials are good choices to keep your feet dry.
- Layered Clothing Strategy:
- Dress in layers so you can adjust your clothing according to your activity level and the weather conditions.
- Extra Clothing:
- Extra Socks and Gloves: In case your first pair gets wet.
- Backup Base Layers: In case of unexpected moisture or if you need to change.
- Sleeping Attire:
- Warm Pajamas or Base Layers: Keep dedicated clothing for sleeping to stay warm inside your sleeping bag.
- Gaiters:
- Gaiters: Strap these over your boots to keep snow out and provide an extra layer of protection.
- Backpack Rain Cover:
- Rain Cover: Ensure your backpack and its contents stay dry in case of precipitation.
- Sunglasses and Sunscreen:
- UV Protection: Snow reflects sunlight, and it’s important to protect your eyes and skin.
Remember to check the weather forecast before your trip and adjust your clothing accordingly. It’s better to be slightly over-prepared than under-prepared when it comes to winter camping.
Show off your winter camping outfit when camping at Knoxville Campground!
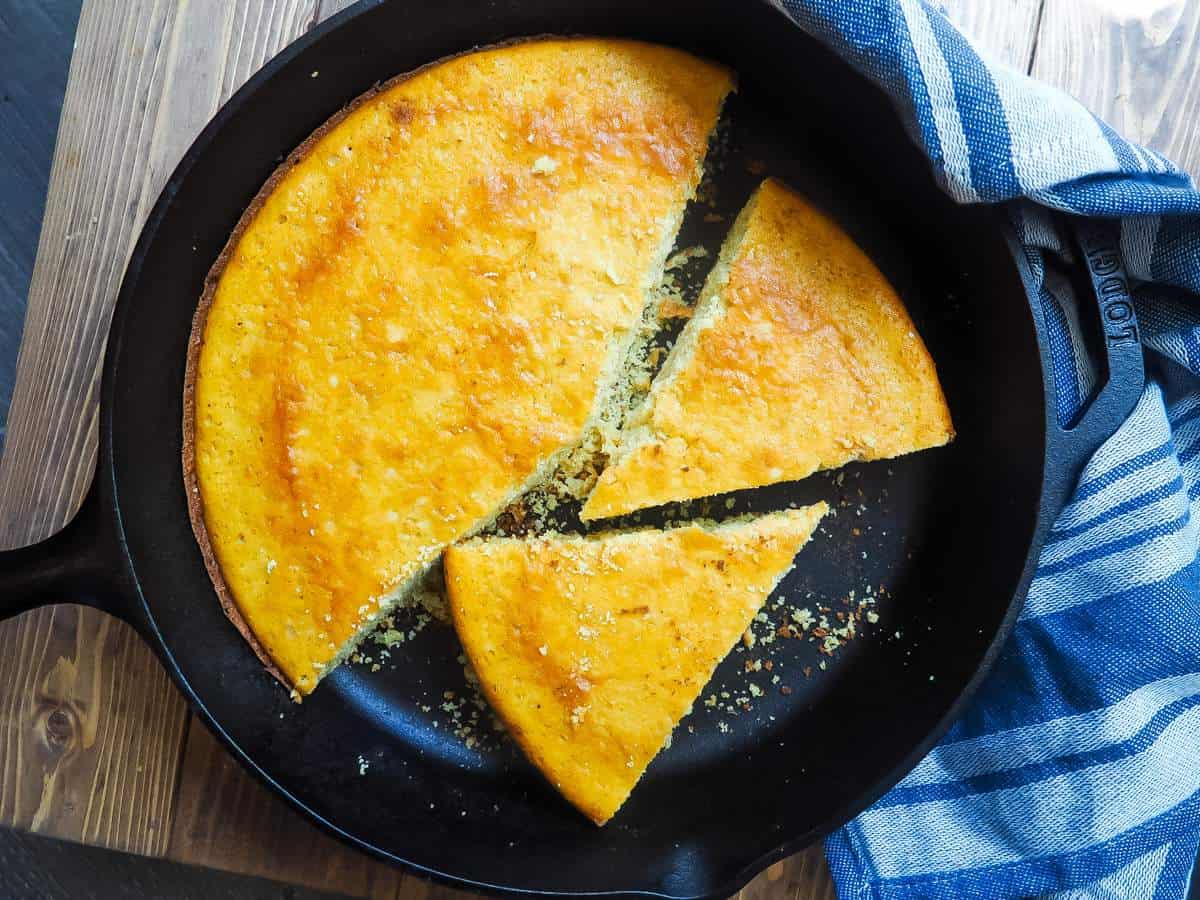
Camping Skillet Cornbread
Camping skillet cornbread is a delicious and easy-to-make treat that can be enjoyed while spending time outdoors. Here’s a simple recipe for making skillet cornbread on a camping trip:
Ingredients:
- 1 cup cornmeal
- 1 cup all-purpose flour
- 1 tablespoon baking powder
- 1/2 teaspoon salt
- 1 cup milk (can use powdered milk mixed with water if refrigeration is an issue)
- 1/4 cup vegetable oil or melted butter
- 1/4 cup honey or sugar (adjust to taste)
- 2 large eggs
- Cooking spray or a small amount of oil for greasing the skillet
Instructions:
- Prepare the Campfire:
- If you’re using a campfire, make sure you have a good bed of hot coals. If you’re using a camping stove, have it preheated.
- Preheat the Skillet:
- Place a cast-iron skillet on the campfire grate or camping stove and allow it to preheat. You want it to be hot, but not smoking.
- Mix Dry Ingredients:
- In a mixing bowl, combine the cornmeal, all-purpose flour, baking powder, and salt.
- Mix Wet Ingredients:
- In another bowl, whisk together the milk, vegetable oil or melted butter, honey or sugar, and eggs.
- Combine Wet and Dry Ingredients:
- Pour the wet ingredients into the dry ingredients and stir until just combined. Be careful not to overmix; a few lumps are okay.
- Grease the Skillet:
- Carefully remove the hot skillet from the campfire or stove. Coat it with cooking spray or a small amount of oil to prevent sticking.
- Pour Batter into Skillet:
- Pour the cornbread batter into the hot, greased skillet.
- Cooking on the Campfire:
- Place the skillet back on the campfire grate over the hot coals. Cover with a lid or foil to help trap heat. Bake for about 20-25 minutes or until the edges are golden brown, and a toothpick inserted into the center comes out clean.
- Cooking on a Camping Stove:
- If you’re using a camping stove, cover the skillet and cook over medium heat for about 20-25 minutes or until done.
- Cool and Serve:
- Allow the cornbread to cool slightly before slicing and serving. You can enjoy it on its own or with butter, honey, or your favorite toppings.
This camping skillet cornbread is a versatile and satisfying addition to your outdoor meals. Adjust the sweetness and other ingredients according to your preferences and the resources available during your camping trip.
Try out this recipe on your next camping trip to Knoxville Campground.
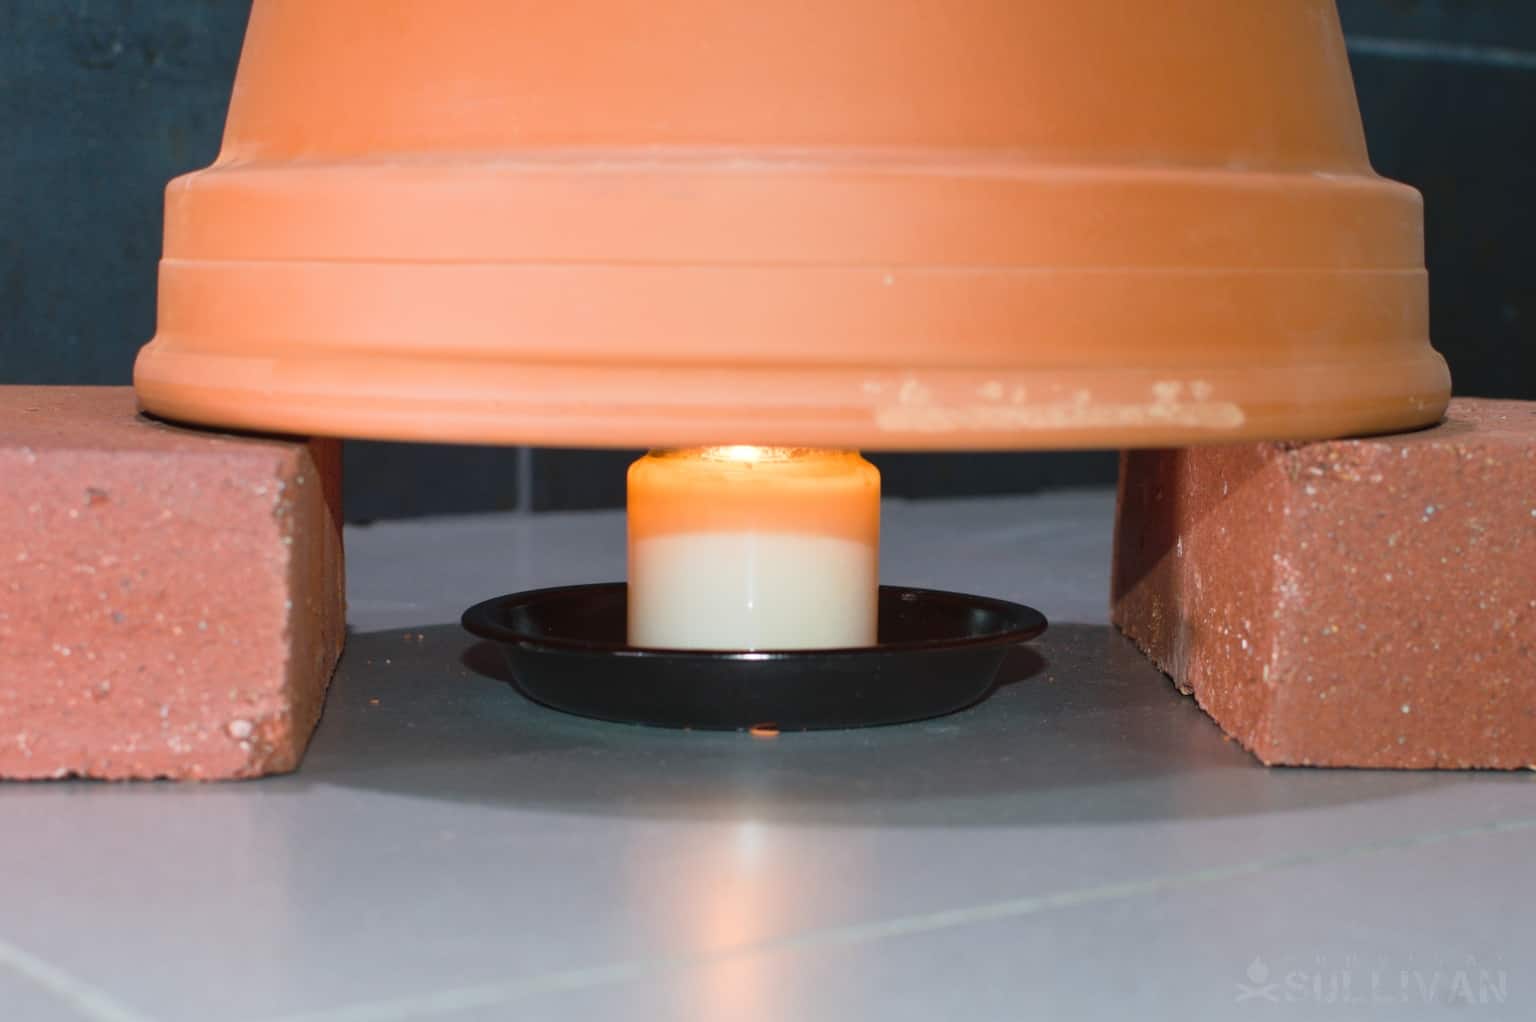
Flower Pot Heater
A flower pot heater, often referred to as a “flower pot candle heater” or “terra cotta heater,” is a simple DIY heating device that can help to distribute warmth in a small area. It is not a replacement for traditional heating systems but can be useful for providing a small amount of supplemental heat. Here’s how you can make one:
Materials you’ll need:
- Terracotta (clay) flower pots: You’ll need two flower pots, one smaller and one larger. The smaller pot should fit inside the larger pot with some space left around it. Both should be unglazed to allow for heat transfer.
- Candles: Tea light candles or small votive candles work well. You’ll need several of them.
- Bricks or a metal tray: These are used as a base for the flower pots and candles.
- Matches or a lighter
- Thermometer (optional): This will help you monitor the temperature.
Steps:
- Prepare the Base:
Place bricks or a metal tray on a stable, fireproof surface. This will serve as the base for your flower pot heater. - Insert Candles:
Place the tea light or votive candles in a circular pattern on the base. The number of candles you use will depend on the size of your pots and the amount of heat you want. Start with a few and add more if needed. - Assemble the Flower Pots:
Take the larger flower pot and place it upside down over the candles, so it acts as a cover for them. Leave some space between the candles and the pot to allow for airflow. - Place the Smaller Flower Pot:
Place the smaller flower pot upside down inside the larger pot. This will create an enclosed space between the two pots where the heat will accumulate. Make sure there is some space left around the smaller pot to allow air to flow. - Light the Candles:
Use matches or a lighter to light the candles through the hole in the bottom of the larger flower pot. The candles will start to heat the inside of the smaller pot, and the heat will escape through the top hole. - Monitor Temperature (Optional):
If you want to monitor the temperature inside the flower pot heater, you can place a thermometer through the top hole. Be cautious not to block the airflow too much with the thermometer.
Safety Precautions:
- Always place the flower pot heater on a fireproof, stable surface.
- Keep flammable materials away from the heater.
- Never leave the heater unattended.
- Ensure there is adequate ventilation in the room to prevent carbon monoxide buildup.
- Be cautious of hot surfaces and open flames.
Remember that this type of heater is not very efficient and will not replace a proper heating system. It can provide some localized warmth and might be useful in small, well-ventilated areas. If you need a more effective heating solution, consider investing in a space heater or other heating equipment designed for the purpose.
Try this trick out during cold nights camping at Knoxville Campground.

Campfire Sweet Potatoes with Marshmallows
Campfire sweet potatoes with marshmallows is a delightful and comforting campfire dessert or side dish. Here’s a simple recipe to make this tasty treat while enjoying the great outdoors:
Ingredients:
- Sweet potatoes
- Marshmallows
- Aluminum foil
- Butter or cooking spray
- Cinnamon (optional)
- Brown sugar (optional)
Instructions:
- Prepare the campfire: Build a campfire and let it burn down until you have a good bed of hot coals. You’ll be cooking the sweet potatoes in the coals.
- Wash and scrub the sweet potatoes thoroughly. You can leave the skins on for a rustic touch, or peel them if you prefer.
- Cut the sweet potatoes into slices or chunks, depending on your preference. Make sure they are relatively thin so that they cook evenly.
- Place each sweet potato slice or chunk on a piece of aluminum foil. You can use individual foil packets or create one large one to cook all the sweet potatoes together.
- Add a small pat of butter or use cooking spray to lightly grease the sweet potatoes. This will help them cook and prevent sticking.
- If desired, sprinkle a little cinnamon and brown sugar over the sweet potatoes for extra flavor.
- Wrap the aluminum foil around the sweet potatoes, creating a tight seal. Make sure there are no openings for the heat or flames to get in.
- Carefully place the sweet potato packets on the hot coals of the campfire. Be cautious not to place them directly in the flames, as this can char the sweet potatoes.
- Cook the sweet potatoes for about 20-30 minutes, depending on the intensity of the campfire. You can check for doneness by opening a packet and poking a sweet potato with a fork. They should be soft and caramelized.
- Once the sweet potatoes are almost done, carefully open the foil packets and place marshmallows on top of each one.
- Continue cooking for an additional 5-10 minutes or until the marshmallows are golden brown and toasted.
- Remove the sweet potato packets from the coals, let them cool for a moment, and then carefully open the foil.
- Serve your campfire sweet potatoes and marshmallows while they’re still warm and gooey. Enjoy this delicious and indulgent campfire treat!
Be cautious when cooking over an open flame, and always have the necessary campfire safety equipment on hand. Additionally, you can get creative with this recipe by adding other toppings or seasonings to suit your taste.
Try this tasty recipe on your next trip to Knoxville Campground!
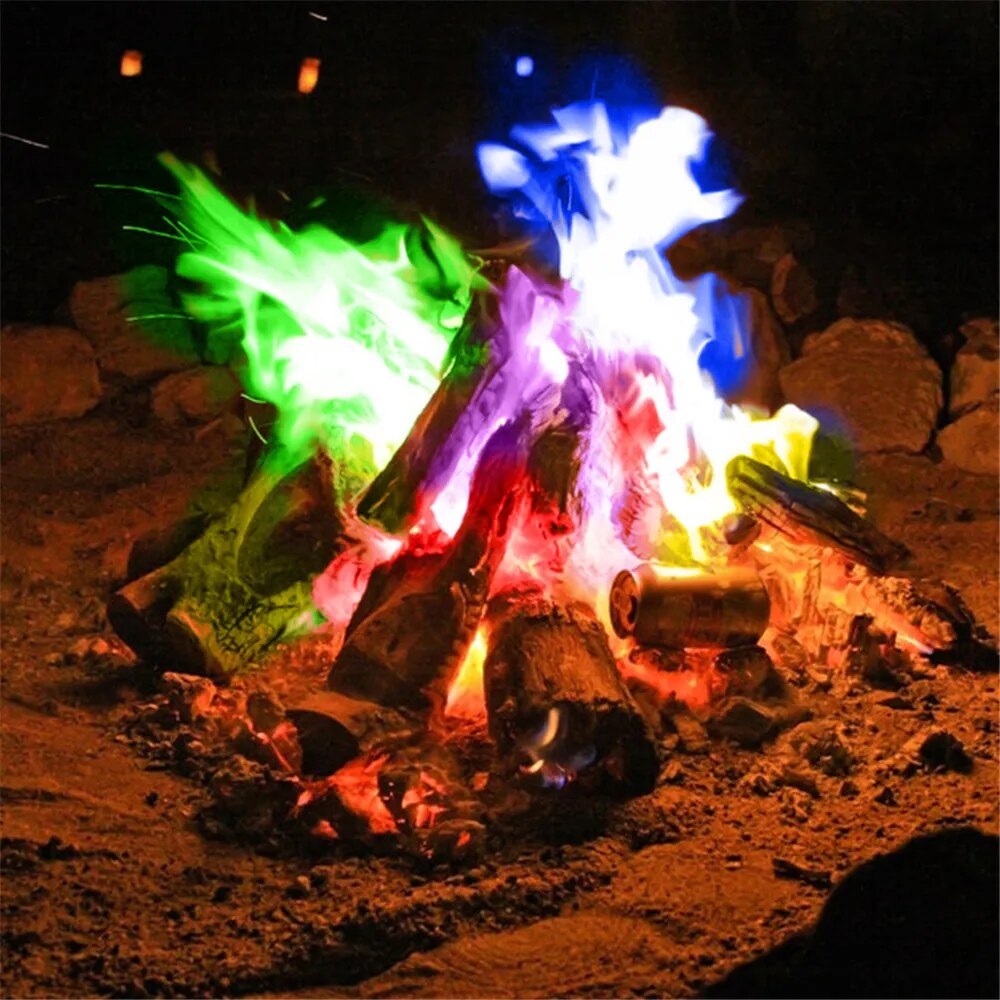
Colored Flames
Creating colored flames can be a fun and visually captivating science experiment or artistic display. Different chemicals can be used to produce various colors in flames. Here’s a basic guide on how to make fire of different colors:
Important Safety Note: Always prioritize safety when working with fire and chemicals. Perform these experiments outdoors, away from flammable materials, and wear appropriate protective gear. Keep a fire extinguisher and a bucket of water nearby.
How to make the Colored Flames
- Basic Fire Safety: Before you start, ensure you understand basic fire safety procedures and have the necessary safety equipment, such as fire-resistant gloves and safety goggles.
- Choose the Chemicals:
- Copper – produces a blue-green flame.
- Strontium – creates a red flame.
- Barium – produces a green flame.
- Sodium – results in a yellow flame.
- Lithium – creates a crimson or red flame.
- Potassium – produces a violet flame.
- Prepare the Chemical Solution:
- Dissolve the chosen chemical in a small amount of water. The exact quantity may vary depending on the chemical and the desired intensity of the color.
- Make a paste by mixing the chemical with a flammable substance such as methanol, ethanol, or alcohol-based hand sanitizer. This paste can be used to coat a solid object like a wooden stick.
- Create a Flame:
- You can use a variety of methods to create a flame, such as a candle, Bunsen burner, propane torch, or even a campfire.
- Apply the Chemical:
- Dip a wooden stick, cotton ball, or another suitable material into the chemical solution or paste. Ensure the material is soaked but not dripping.
- Ignite the Flame:
- Carefully ignite the flame source (candle, Bunsen burner, etc.).
- Introduce the Treated Material:
- Hold the treated material in the flame, allowing it to burn. The colored flames should appear as the chemical burns.
- Observe and Enjoy:
- Observe the colored flames, but be cautious not to get too close, as some chemicals can produce intense heat and sparks.
- Dispose Safely:
- After the demonstration, dispose of any leftover chemicals and materials safely, following appropriate disposal guidelines for hazardous substances.
Remember that different chemicals may produce different shades of color, and the exact colors can vary based on the concentration of the chemical used and the temperature of the flame. Always exercise caution and follow safety guidelines when conducting experiments involving fire and chemicals.
We sell color flames in our store! At Knoxville Campground we ask to be safe and take precautions when handling fire.
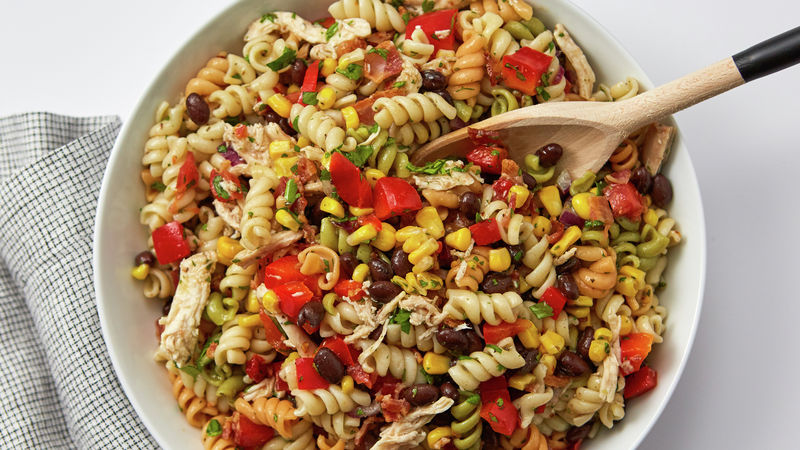
Cowboy Pasta Salad
Cowboy pasta salad is a hearty and flavorful pasta salad that combines pasta with a variety of ingredients commonly associated with Western or Southwestern cuisine. Here’s a basic recipe for cowboy pasta salad:
Ingredients:
- 2 cups cooked pasta (such as rotini or penne)
- 1 cup cooked and diced chicken (you can use grilled or rotisserie chicken)
- 1 cup diced bell peppers (red, green, or a mix of colors)
- 1 cup canned corn kernels, drained
- 1 cup canned black beans, drained and rinsed
- 1/2 cup diced red onion
- 1/2 cup diced tomatoes
- 1/2 cup shredded cheddar cheese
- 1/4 cup chopped fresh cilantro (optional)
- 1/4 cup diced jalapeño peppers (optional, for some heat)
- 1/4 cup ranch dressing
- 1/4 cup BBQ sauce
- Salt and pepper to taste
Instructions:
- Cook the pasta according to the package instructions until al dente. Drain and rinse under cold water to cool it down. Allow it to drain thoroughly.
- In a large mixing bowl, combine the cooked pasta, diced chicken, diced bell peppers, corn, black beans, red onion, diced tomatoes, shredded cheddar cheese, and chopped cilantro (if using). Toss everything together.
- In a small bowl, whisk together the ranch dressing and BBQ sauce until well combined.
- Pour the dressing mixture over the pasta salad and toss everything together until the salad is evenly coated with the dressing.
- Add diced jalapeño peppers if you want to add some heat to your salad.
- Season the salad with salt and pepper to taste. Adjust the seasoning as needed.
- Cover the salad and refrigerate for at least an hour before serving to allow the flavors to meld together.
- Before serving, you can garnish with additional cilantro or shredded cheese if desired.
Cowboy pasta salad is a versatile dish, and you can customize it to suit your taste by adding or omitting ingredients like avocado, bacon bits, or olives. It’s perfect for picnics, and potlucks, or as a side dish for barbecues and grilled meats. Enjoy!
Try out this recipe on your next to to Knoxville Campground!

Mosquito Repellents
Mosquito repellents are substances designed to deter mosquitoes from approaching and biting humans or animals. They are commonly used to reduce the risk of mosquito-borne diseases and the discomfort caused by mosquito bites. There are various types of mosquito repellents available, including:
Types
- Chemical Repellents: These are synthetic compounds that interfere with the mosquito’s ability to detect humans or animals by disrupting their olfactory senses. Common chemical repellents include DEET (N-Diethyl-meta-toluamide), picaridin, IR3535, and oil of lemon eucalyptus (OLE).
- Natural Repellents: These are derived from plant-based ingredients and are considered more environmentally friendly. Examples of natural mosquito repellents include citronella oil, lemon eucalyptus oil, lavender oil, and neem oil. While they may not be as long-lasting as chemical repellents, they can still provide some protection.
- Electronic Repellents: These devices emit ultrasonic sound waves or use other technologies to deter mosquitoes. However, their effectiveness is often debated, and studies have shown mixed results.
- Clothing and Gear: Some clothing, especially treated with insect repellent, can provide an additional layer of protection. Mosquito nets and mesh clothing are also effective at physically preventing mosquitoes from coming into contact with the skin.
- Repellent Candles and Incense: These products release repellent compounds when burned, creating a protective barrier in a localized area.
Tips
When using mosquito repellents, it’s important to follow the manufacturer’s instructions and take precautions, especially for young children, pregnant women, and individuals with sensitive skin. Here are some tips for using repellents effectively:
- Apply the repellent evenly on exposed skin or clothing.
- Reapply as directed on the product label, especially after swimming or sweating.
- Avoid applying repellent near the eyes, mouth, and open wounds.
- Wash off the repellent when it’s no longer needed.
- Use proper clothing to minimize exposed skin.
- Consider using mosquito nets and screens, especially while sleeping.
- Eliminate sources of standing water where mosquitoes can breed.
Remember that while mosquito repellents can be effective, they may not provide 100% protection. It’s important to combine repellent use with other control measures for comprehensive protection against mosquito-borne diseases.
Use this tip to repel mosquitoes at your next visit with us at Knoxville Campground.

Foil Packet Apple Pie
Apple pie is a classic dessert recipe, that has been passed down over the years. It is also an easy and delicious dessert perfect for camping trips! Here is our recipe for making apple pie in foil packets during your camping trip!
Ingredients: For the Filling:
- 2-3 medium-sized apples (peeled, cored, and sliced)
- 2 tablespoons brown sugar
- 1 teaspoon cinnamon
- 1/4 teaspoon nutmeg (optional)
- 1 tablespoon lemon juice
For the Crumble Topping:
Other:
- 1/2 cup old-fashioned oats
- 1/4 cup all-purpose flour
- 1/4 cup brown sugar
- 1/4 cup butter, softened
- 1/2 teaspoon cinnamon
- 4 sheets of heavy-duty aluminum foil
- Cooking spray or additional butter for greasing
Instructions:
- Prepare the Campfire:
- Build a campfire and let it burn down to hot coals. You’ll need a medium heat for cooking the foil packets. Alternatively, you can use a charcoal grill or even your home oven if you’re not camping.
- Prepare the Filling:
- In a bowl, combine the sliced apples, brown sugar, cinnamon, nutmeg, and lemon juice. Toss well to coat the apples evenly.
- Prepare the Crumble Topping:
- In another bowl, mix the oats, flour, brown sugar, softened butter, and cinnamon. Use your fingers or a fork to combine the ingredients until the mixture becomes crumbly.
- Assemble the Foil Packets:
- Lay out four sheets of heavy-duty aluminum foil, each about 12 inches long.
- Grease the center of each foil sheet with cooking spray or a thin layer of butter to prevent sticking.
- Divide the apple filling equally among the four foil sheets, placing it in the center.
- Add the Topping:
- Sprinkle the crumble topping evenly over the apple filling in each packet.
- Seal the Packets:
- Carefully bring the sides of the foil up and fold them together at the center. Fold the edges over multiple times to create a tight seal, leaving a little room for steam to expand.
- Cook the Packets:
- Place the sealed foil packets on the campfire grill grate or over the hot coals. If using a charcoal grill or oven, place the packets on the grill grates.
- Cook for about 15-20 minutes, turning the packets occasionally for even cooking. The cooking time may vary depending on the heat of your campfire or grill.
- Check for Doneness:
- Open one packet carefully to check if the apples are soft and cooked through. If not, reseal the packet and continue cooking for a few more minutes.
- Serve:
- Once the apple filling is cooked to your liking, carefully remove the packets from the heat.
- Allow them to cool slightly before opening, as they will be very hot.
- You can enjoy the foil packet apple pies as they are or serve them with a scoop of vanilla ice cream.
Remember, cooking times can vary based on the heat source and the specific conditions, so keep an eye on the packets to prevent burning. Enjoy your delicious campfire foil packet apple pies!
Try this gooey dessert on your next trip to Knoxville Campground!

Stylish Camping
Looking stylish while camping is entirely possible, and it can add a fun and creative dimension to your outdoor adventure. Here are some tips to help you achieve a stylish camping look:
- Choose functional and fashionable outdoor clothing: Opt for clothing that is both practical for outdoor activities and fashionable. Look for well-fitted and comfortable activewear, such as moisture-wicking shirts, quick-drying pants, and breathable jackets. Brands that specialize in outdoor clothing often offer stylish options designed for both performance and aesthetics.
- Layering is key: Layering not only helps you stay comfortable in fluctuating temperatures but also allows you to mix and match clothing for a fashionable look. Invest in versatile pieces like vests, flannels, and lightweight jackets that can be paired with different outfits.
- Select fashionable gear: Look for camping gear with designs and colors. For example, choose a trendy and modern tent or a chic camping chair that complements your overall camping aesthetic.
- Accessorize thoughtfully: Accessories can make a big difference in elevating your camping style. Consider adding a stylish sun hat, a bandana, or a fashionable beanie to your outfit. Sunglasses can also add a touch of flair while protecting your eyes.
- Invest in quality footwear: Comfortable and stylish footwear is essential. Opt for durable hiking boots or trendy outdoor sandals that match your camping attire.
- Don’t forget about grooming: While camping, maintaining personal hygiene is crucial, but that doesn’t mean you can’t look good. Keep your hair tidy and bring travel-sized grooming essentials like a compact mirror, hairbrush, and biodegradable wipes for freshening up.
- Coordinate colors and patterns: Choose a color scheme or mix and match patterns to create a cohesive and fashionable look. Neutrals are easy to pair, while vibrant colors can add a pop to your camping wardrobe.
- Pack fashionable loungewear: For downtime at the campsite, pack comfortable yet stylish loungewear. A cozy sweater or a soft flannel shirt can be both practical and fashionable for relaxing around the campfire.
- Embrace practical accessories: Some accessories can be both practical and stylish. For example, a well-designed backpack can hold your camping essentials while adding a stylish element to your overall look.
- Confidence is key: The most important aspect of looking stylish while camping is confidence. Embrace your personal style and wear what makes you feel comfortable and fabulous in the outdoors.
Remember that camping is about enjoying nature and having fun, so while looking stylish is great, it’s equally essential to prioritize comfort and functionality. With a bit of creativity and planning, you can achieve a stylish and functional wardrobe that enhances your outdoor experience
Come to Knoxville Campground for a getaway and camp in style!
Family owned and operated, Kiefer Campgrounds strive to offer you the best rates for a comfortable location with outstanding service, and spotless facilities. When you stay in one of our parks, you are no longer just a happy camper, but a part of our family! We are most certain you will enjoy your stay with us. Pick your favorite location and book your spot now before it’s too late! You’ll be happy you did!


